| January 2026 |
|---|
| Sun |
Mon |
Tue |
Wed |
Thu |
Fri |
Sat |
| |
|
|
|
1 |
2 |
3 |
| 4 |
5 |
6 |
7 |
8 |
9 |
10 |
| 11 |
12 |
13 |
14 |
15 |
16 |
17 |
| 18 |
19 |
20 |
21 |
22 |
23 |
24 |
| 25 |
26 |
27 |
28 |
29 |
30 |
31 |
|
|
XPanel: The First Open Source Panel Saw Jig - Part 1
I'm an IT guy, so I'm very familiar with the concept of open source software, and I love the idea. So, here's my contribution to the relatively new open source "hardware" movement.
One of the most frustrating and difficult things to do in a home shop, is breaking down full 4'x8' sheet stock panels, or large cutoffs of sheet stock, into smaller project pieces.
I've priced the ready made prefabricated panel saws that can be found online, and they're way out of range for most home shops (certainly mine) and I've wrestled with taking on one of the many DIY versions to be found online as well, but even the kits for them are expensive, and the work involved in a version built from scratch with plans is daunting.
The whole time I've been looking around for some sort of panel sawing solution, I've always thought if I had it my way, I'd want something that satisfied what I considered to be several important requirements for hobbyist woodworkers, as follows:
- it must be makeable from inexpensive (i.e. cheap), readily available materials
- it must be quickly assembled and disassembled for storage
- it must not take up much room, whether assembled or stored
- it must go together without permanent fasteners, so as to make it easy to swap out worn pieces (clamps or notches are the preferred methods of fastening for sacrificial pieces)
- pieces that won't ever be cut into, can have permanent fasteners and extensions attached
- occasionally used add-on or attachment pieces, can have permanent fasteners and extensions attached
- it must be functionally flexible and easily modified
So while surfing around one night looking for yet another panel sawing suggestion, I stumbled upon something I thought might be a solution
for my home shop. It was nothing more than just a cheap pair of 2"x4"x8' studs, assembled in an "X" pattern, and fastened together using angled notches in the center edge of each stud. It could be placed on the floor, and it could support even a full 4'x8' sheet of anything for cutting. The idea was to set the blade as high as possible while still cutting through the material, but scoring the supporting X'd 2by's as little as possible.
This idea was good, and it satisfied some of my requirements, but it lacked something to make it a great idea.
Take a look at what I call the XPanel jig. I refer to it as a jig rather than a panel saw, because it behaves and is used much more as a jig is used. Here are pictures with and without an almost full-size sheet on the jig (ignore the incredible amount of junk around it.)
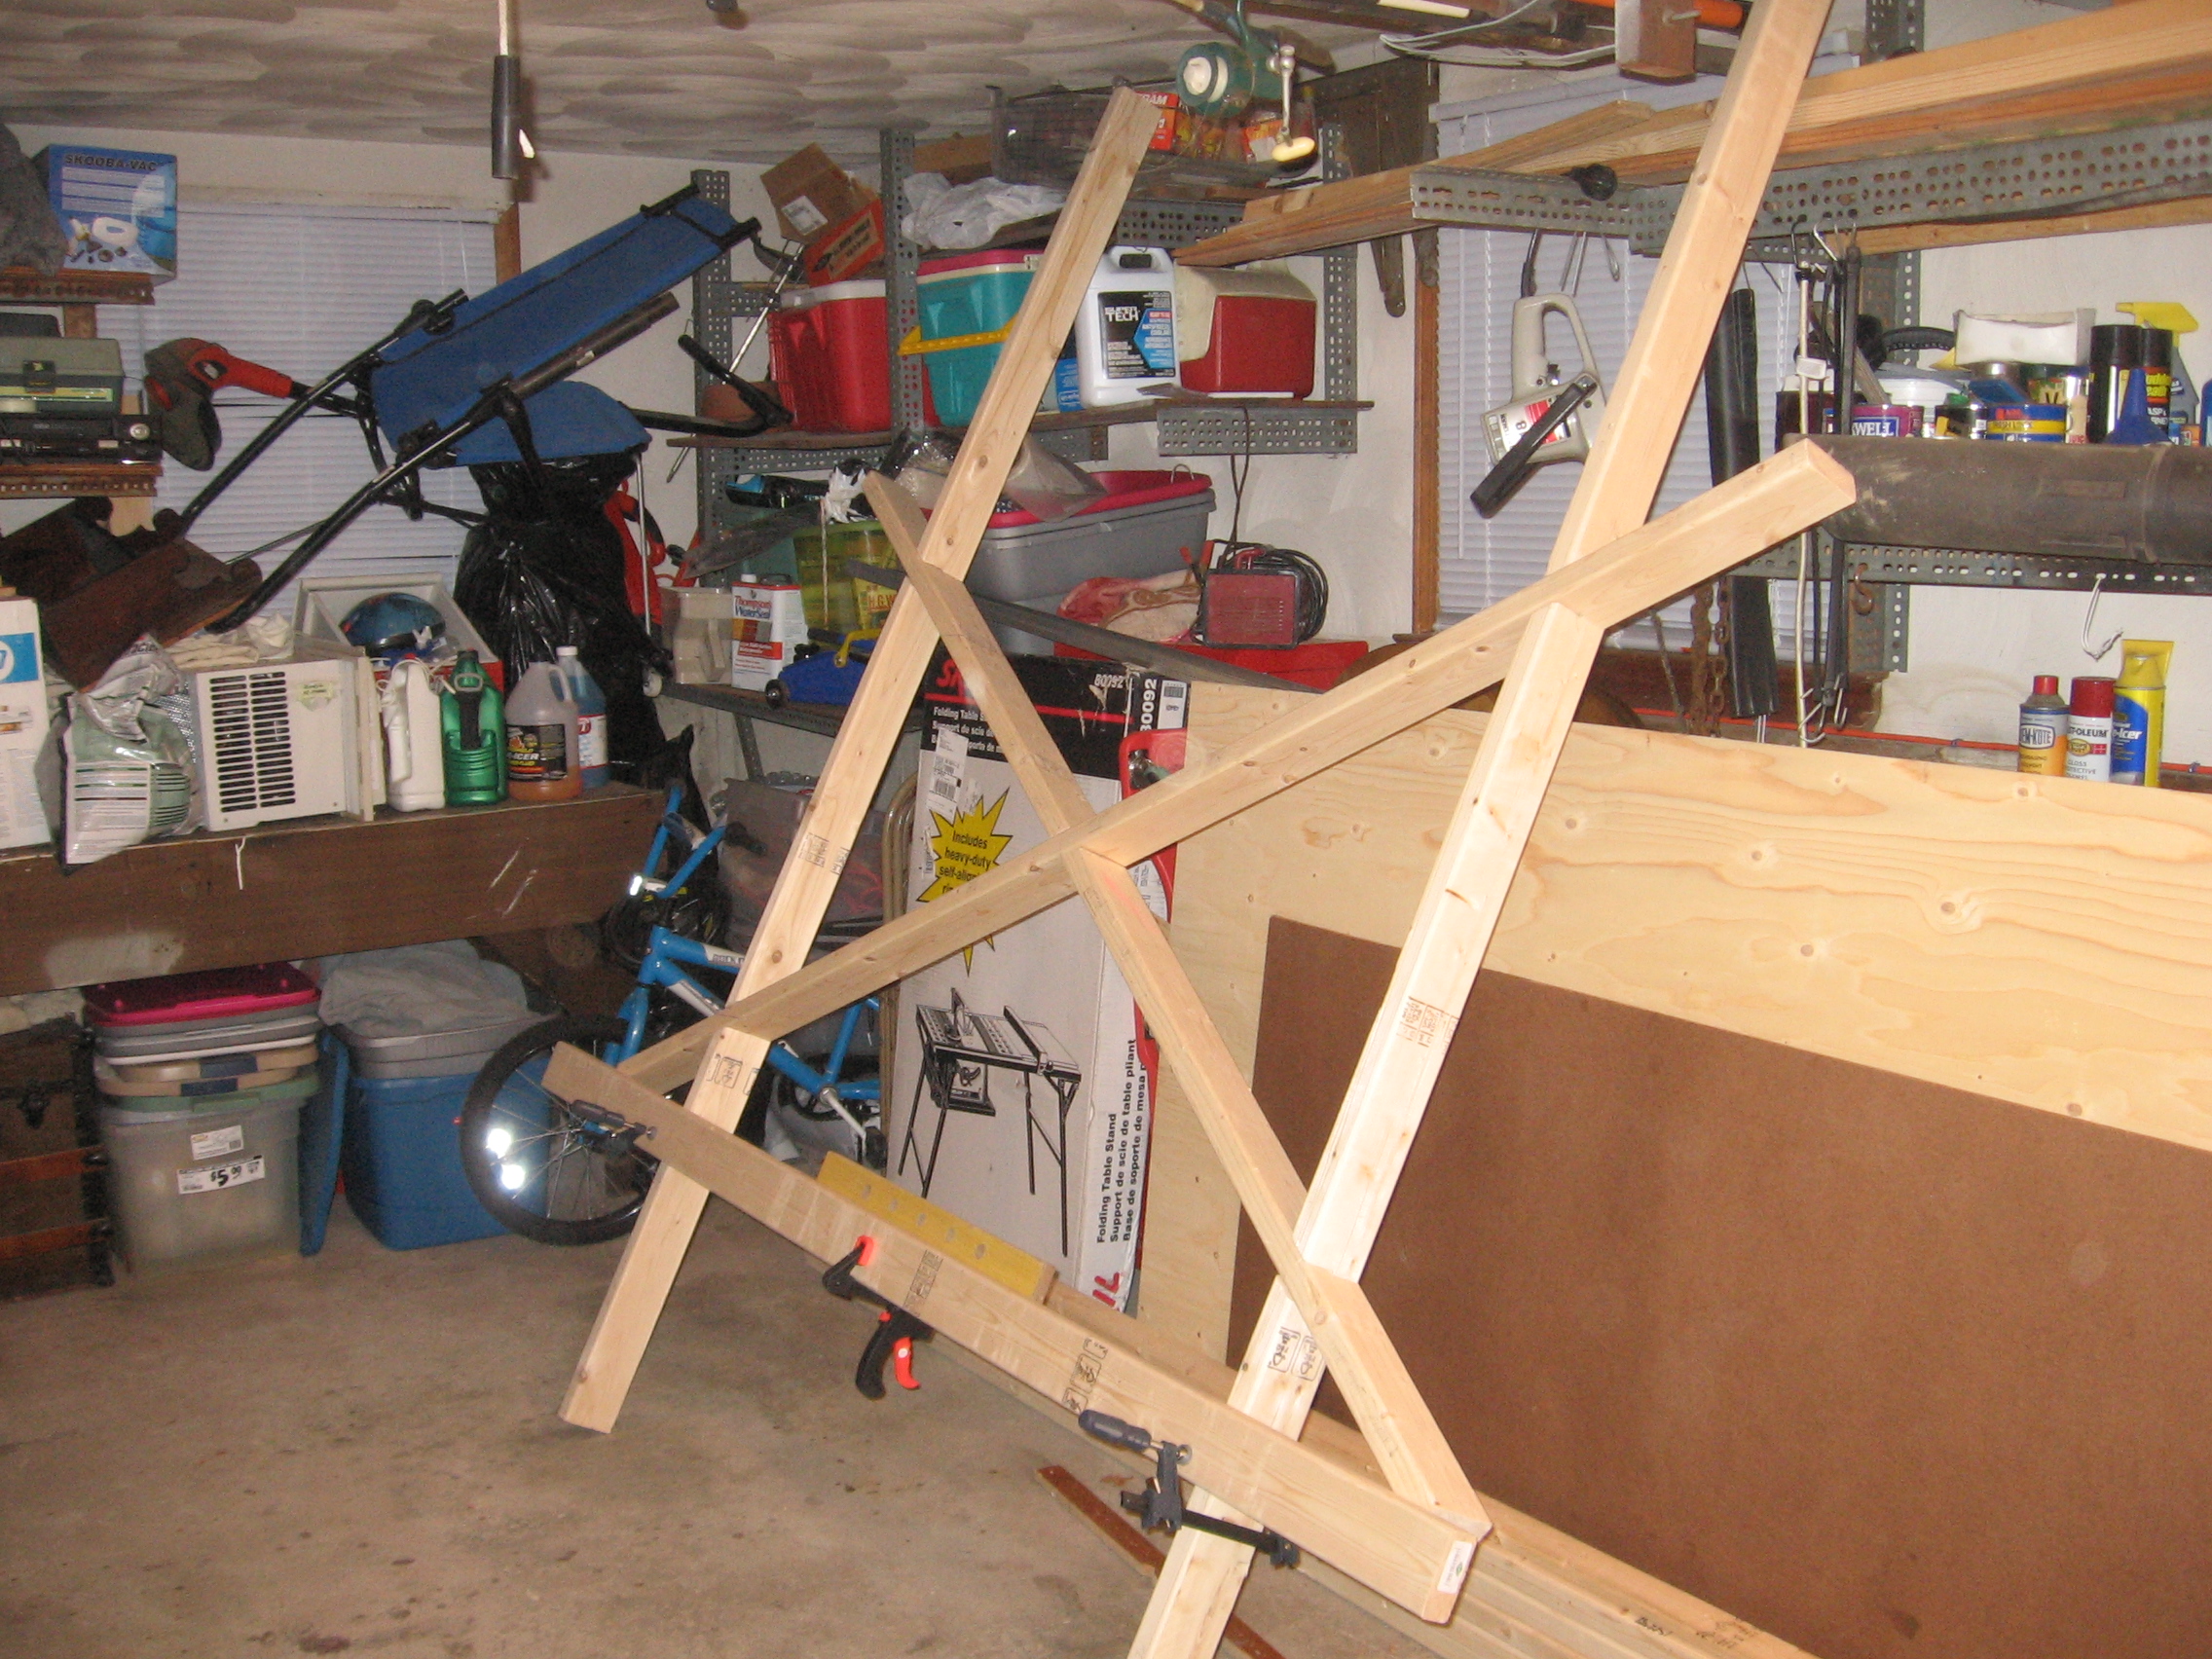
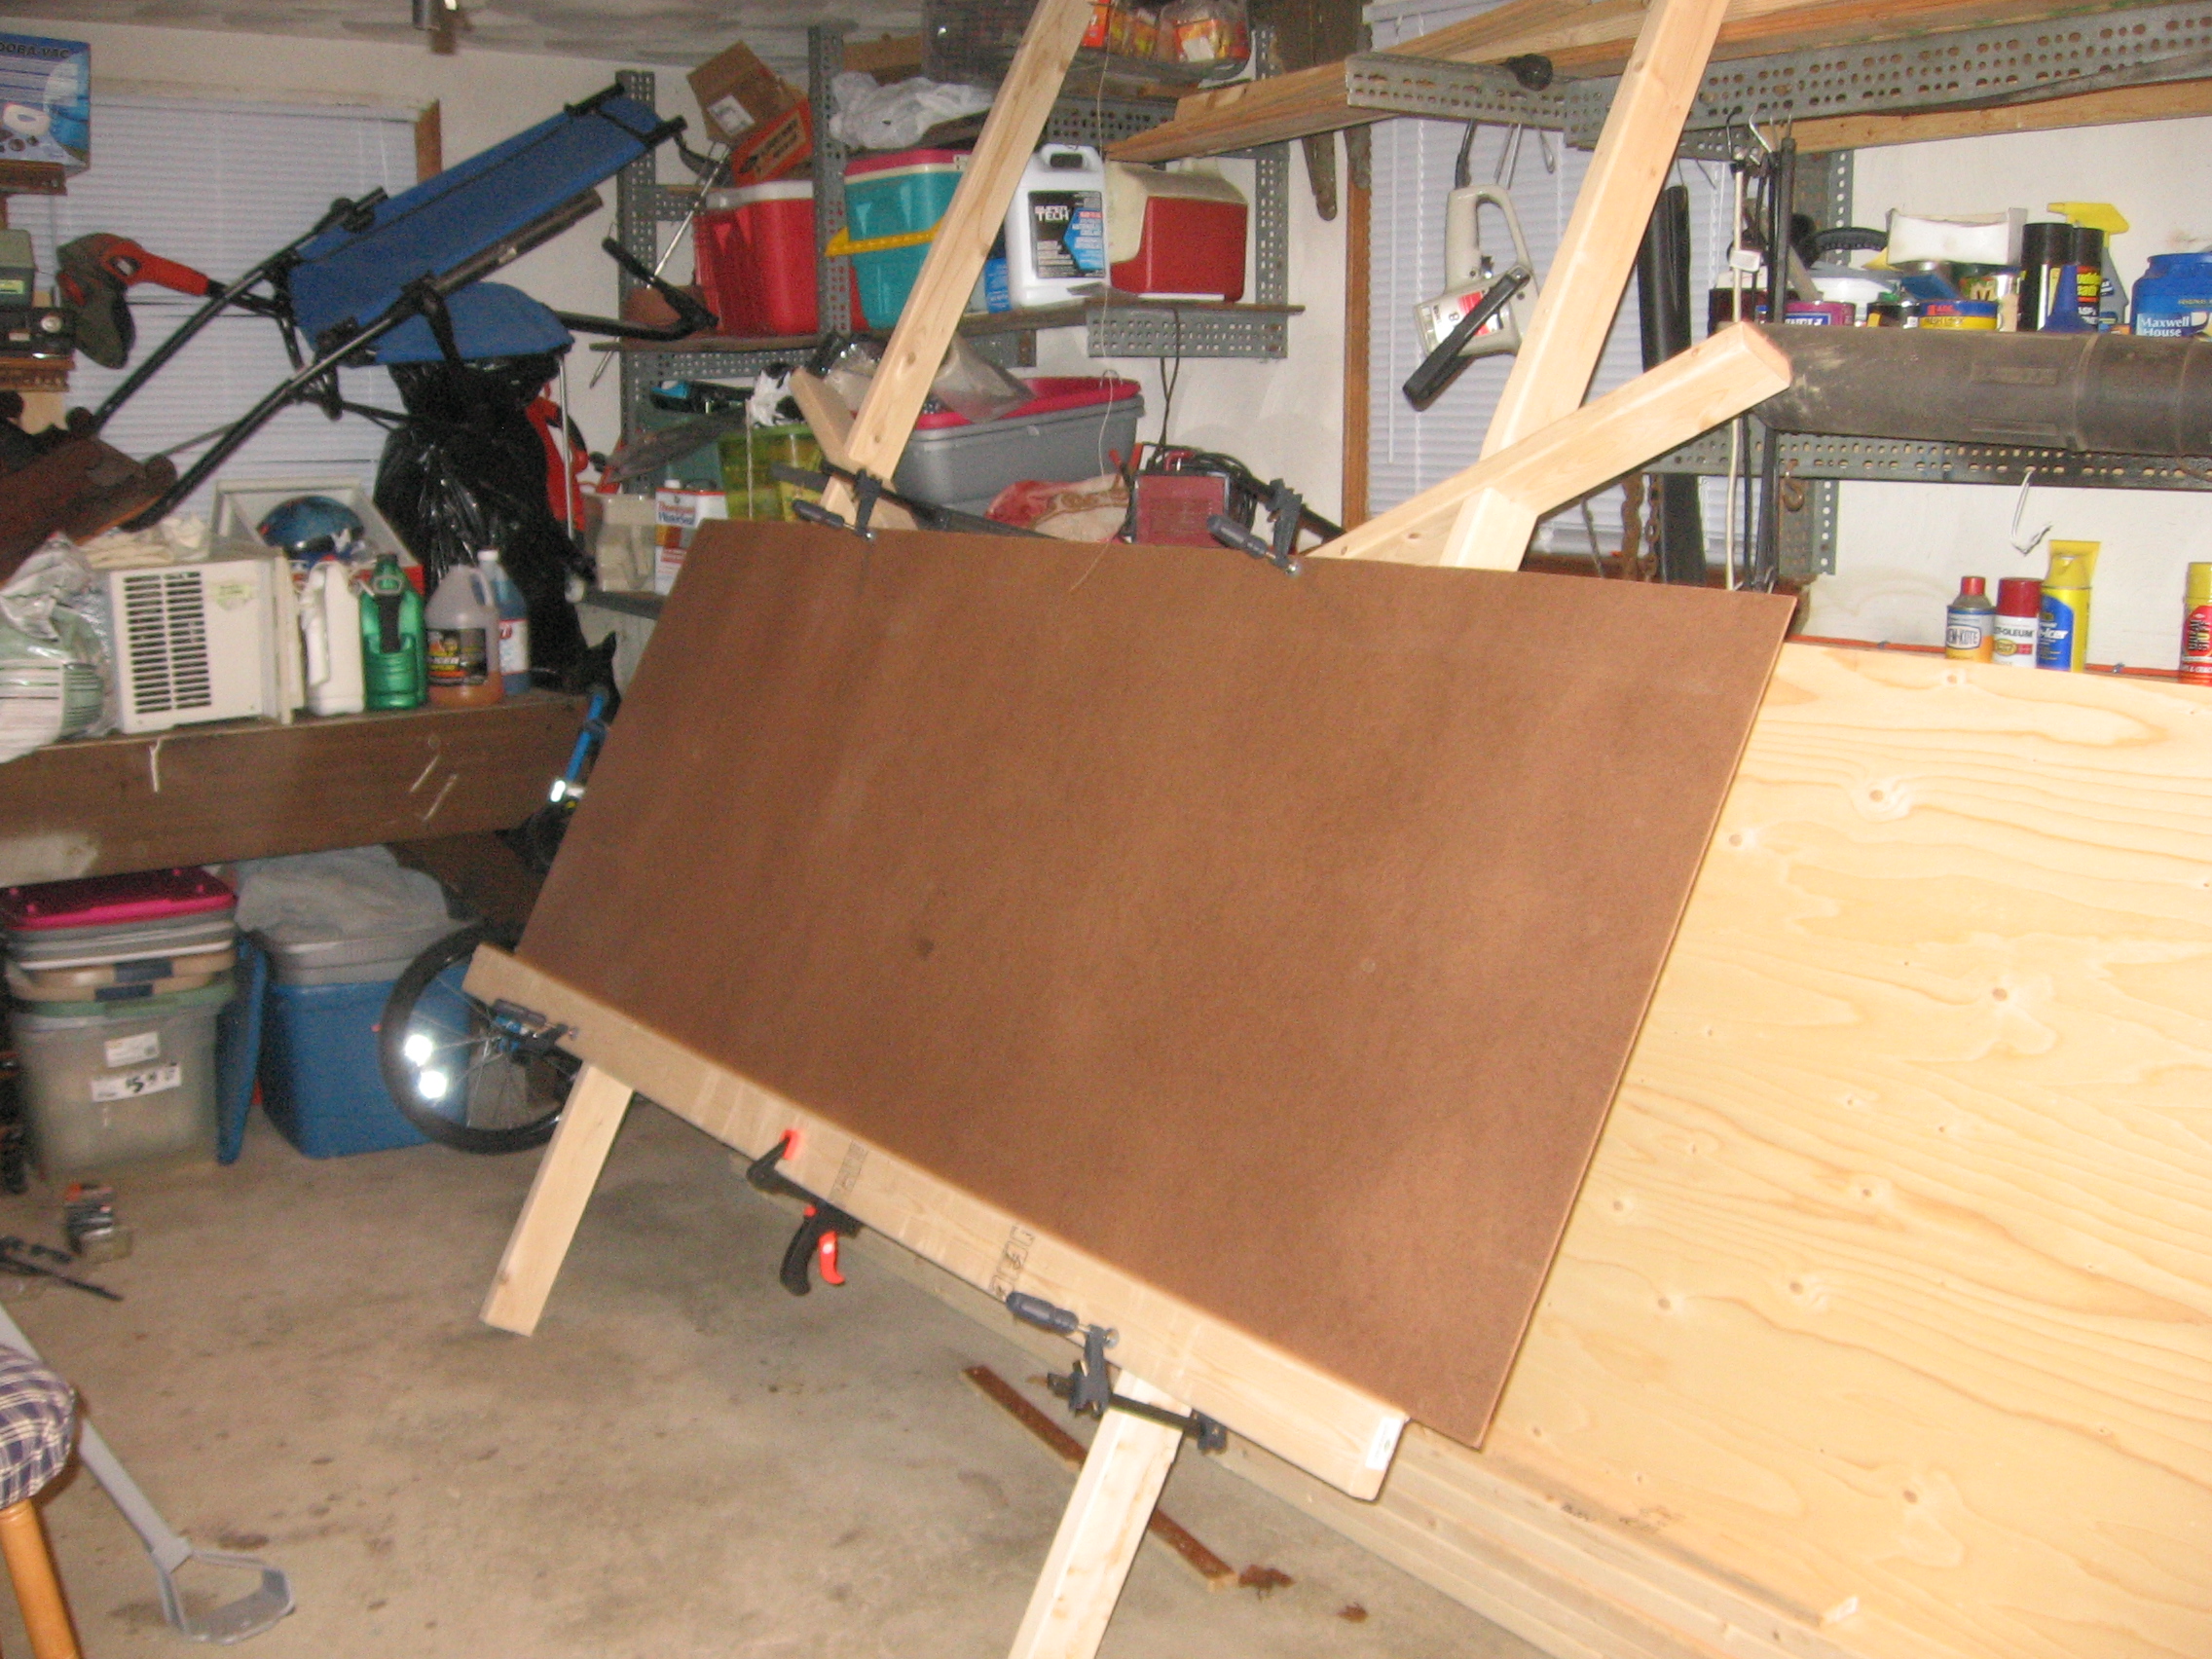
My addition of the vertical studs on each side has made it so the jig can be placed against a wall, and used similar to the way a "real" panel saw is used, and it all goes together and comes apart quickly, and by way of the angled notches, without the use of permanent fasteners. And the addition of a clamped deck rail makes it so a panel can be loaded onto the jig easily, without adding a permanent part to the jig. Here are pics of the angled notches for the vertical members.
IMAGE(S) TO COME
Here's the link to the original "X" jig page again.
I also made three different size circular saw guides, similar to the popular version(s) found on woodworking sites around the internet. Here they are:
IMAGE(S) TO COME
Here is the jig with various size sheets, and with the guides in place:
IMAGE(S) TO COME
The ultimate advantage of this jig is this... EVERY CUT IS PERFORMED HORIZONTALLY, allowing gravity to do most of the work, and eliminating the need for any sort of counterweight system to support the saw during vertical cuts. Here's a picture of how that's accomplished:
IMAGE(S) TO COME
In keeping with the open source concept of this jig, it's flexibility is only limited by your imagination, and my original requirements. I'll be posting pics of some of the compliant "plug-ins" (i.e add-ons and attachments), I've come up with to make the jig even sweeter.
And by all means, if you can think of anything to make the jig even more useful, feel free to comment or ask questions, and of course, I encourage you to make and use the jig and see for yourself how this incredibly simple design just may solve your panel cutting needs at a fraction of the cost of other solutions.
MORE TO FOLLOW...
posted at: 4:31pm on 04-May-2020
path: /Woodworking/Projects | permalink | edit (requires password)
Shop Made Sliding Table for Tablesaw
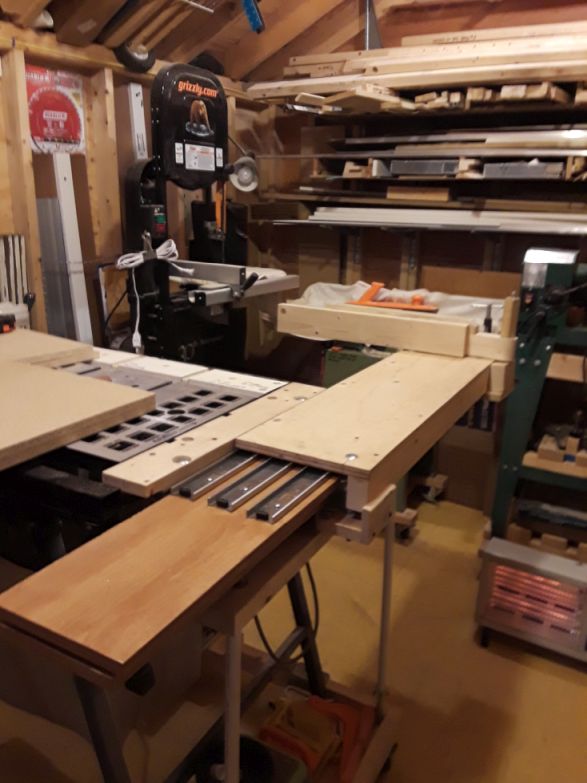
It's kind of rough around the edges, and I'm still tweaking it, but here's my version of a sliding table for my table saw.
It gives me about 31" before the blade.
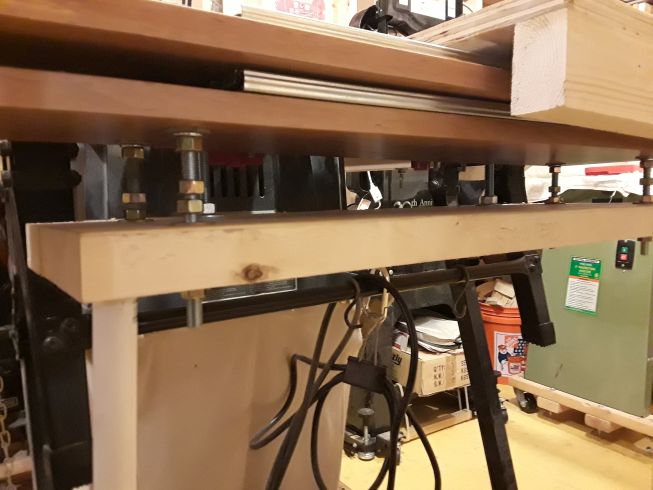
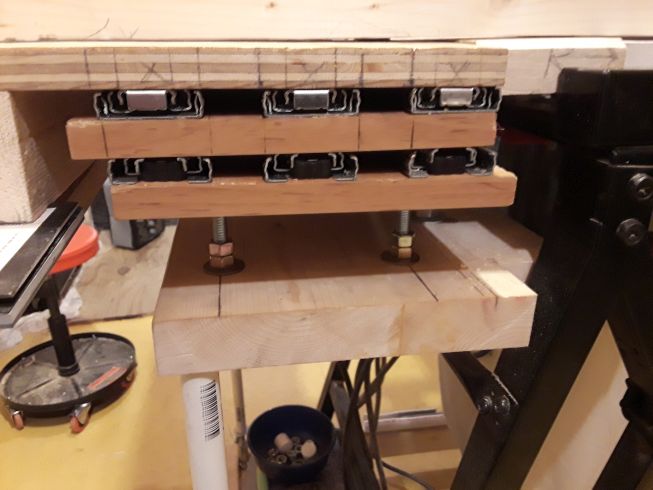
There are three 28" full-extension drawer slides (mounted flat), that control the range of motion before the blade. They're mounted under the top-most level, so as to allow only the top-most level to be pulled back, before the blade. This reduces the weight of the top that slides all the way back.
And there are three 24" full-extension drawer slides (mounted flat), that control the range of motion past the blade. This reserves most of the weight for when sliding beyond the blade (which involves both the top and the second level together), which doesn't usually require the full extension.
Even with the sliding table, I managed to keep the entire table saw setup completely mobile (ignore my claustrophobic shop.)
The beauty of using drawer slides, is that the table has a wide range of forward and backward motion, but the table itself doesn't have to be that long, like other sliding table setups I've seen.
The stacked forward and backward tables can be "locked" in place, because the slides have a built-in locking feature that would have kicked-in when the "drawers" were closed. It's nice because when I move the saw around the shop, the tables don't slide around willy-nilly, but they're easily pushed out of their locked positions when needed. They're in their locked positions in the first pic.
It was all based on the sliding table and cross-cut fence I found here.
Here is a video of how the table moves. It was taken with my cell, just to get something out quick, but I'll post some better footage soon.
Here is another (better) video of the table in action while cross-cutting a wide panel.
For any questions at all, or if you want a pic from a different angle, by all means, just ask in the comments.
Thanks for visiting.
Update:
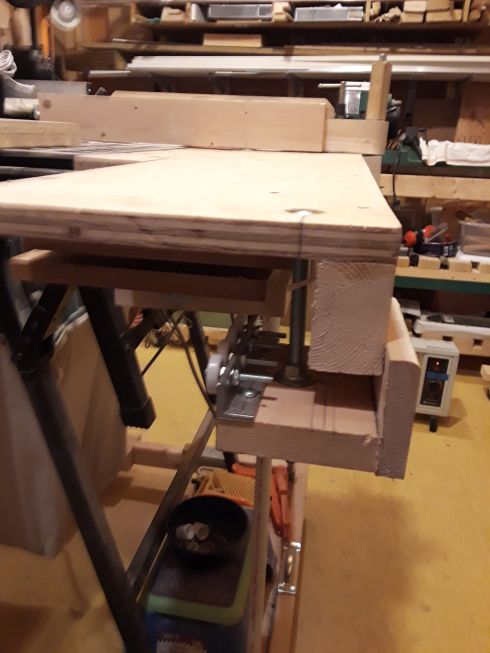
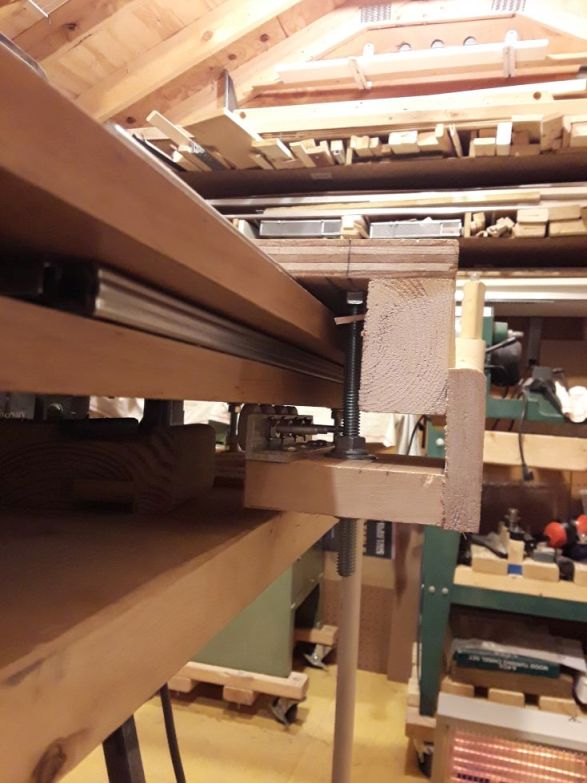
There had been an issue with the sliding table top-level sagging a bit when it was pulled all the way back before the blade, so as to accommodate a wide panel for instance. So I came up with the roller assembly you can see in the bottom three pics. I used two shower door roller replacement kits I got at the orange big-box store. It seems to have worked really well. There's a fraction of the sag that was there before. I'm pleased.
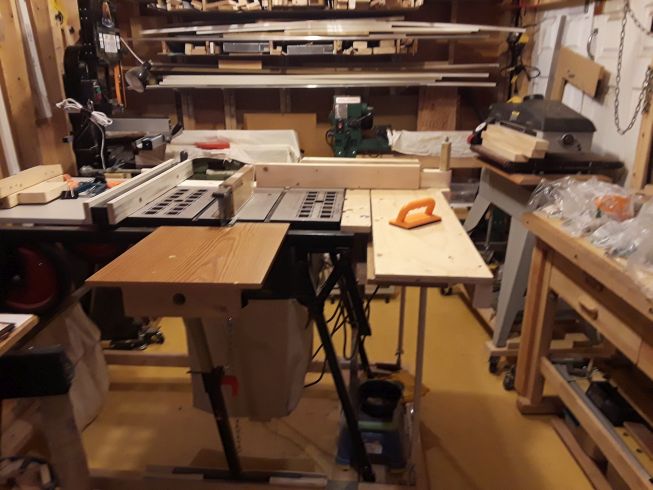
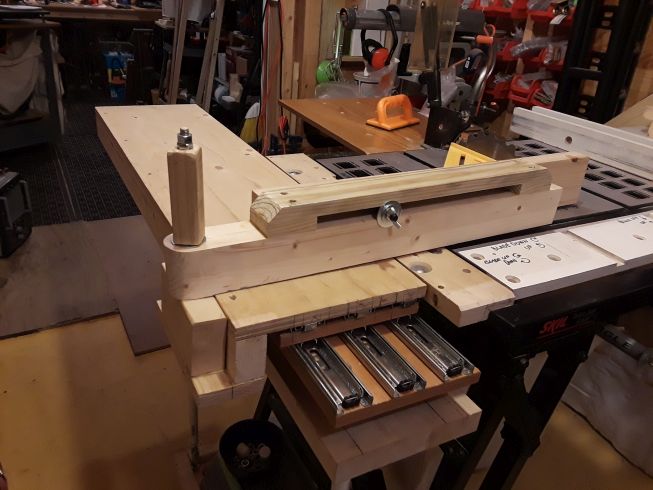

posted at: 12:58pm on 29-Mar-2019
path: /Woodworking/Projects | permalink | edit (requires password)
| January 2026 |
|---|
| Sun |
Mon |
Tue |
Wed |
Thu |
Fri |
Sat |
| |
|
|
|
1 |
2 |
3 |
| 4 |
5 |
6 |
7 |
8 |
9 |
10 |
| 11 |
12 |
13 |
14 |
15 |
16 |
17 |
| 18 |
19 |
20 |
21 |
22 |
23 |
24 |
| 25 |
26 |
27 |
28 |
29 |
30 |
31 |
|
|