| January 2026 |
|---|
| Sun |
Mon |
Tue |
Wed |
Thu |
Fri |
Sat |
| |
|
|
|
1 |
2 |
3 |
| 4 |
5 |
6 |
7 |
8 |
9 |
10 |
| 11 |
12 |
13 |
14 |
15 |
16 |
17 |
| 18 |
19 |
20 |
21 |
22 |
23 |
24 |
| 25 |
26 |
27 |
28 |
29 |
30 |
31 |
|
|
PVC Grass Trimmer Wheels Attachment
The last time I did the trimming around my yard, and around the 4,700 shrubs, posts, and planters in it (okay, that's an exaggeration, but you get my point), I ended the day with an aching back and a sore hip, and I swore I wasn't going to lug my trimmer around and use it the same way ever again.
So this is what I came up with. It can be attached to any trimmer in the same way you see here. I hope it saves your back too.
In a few days, I'll post a short video of it in action. By all means, use the comments for any questions.
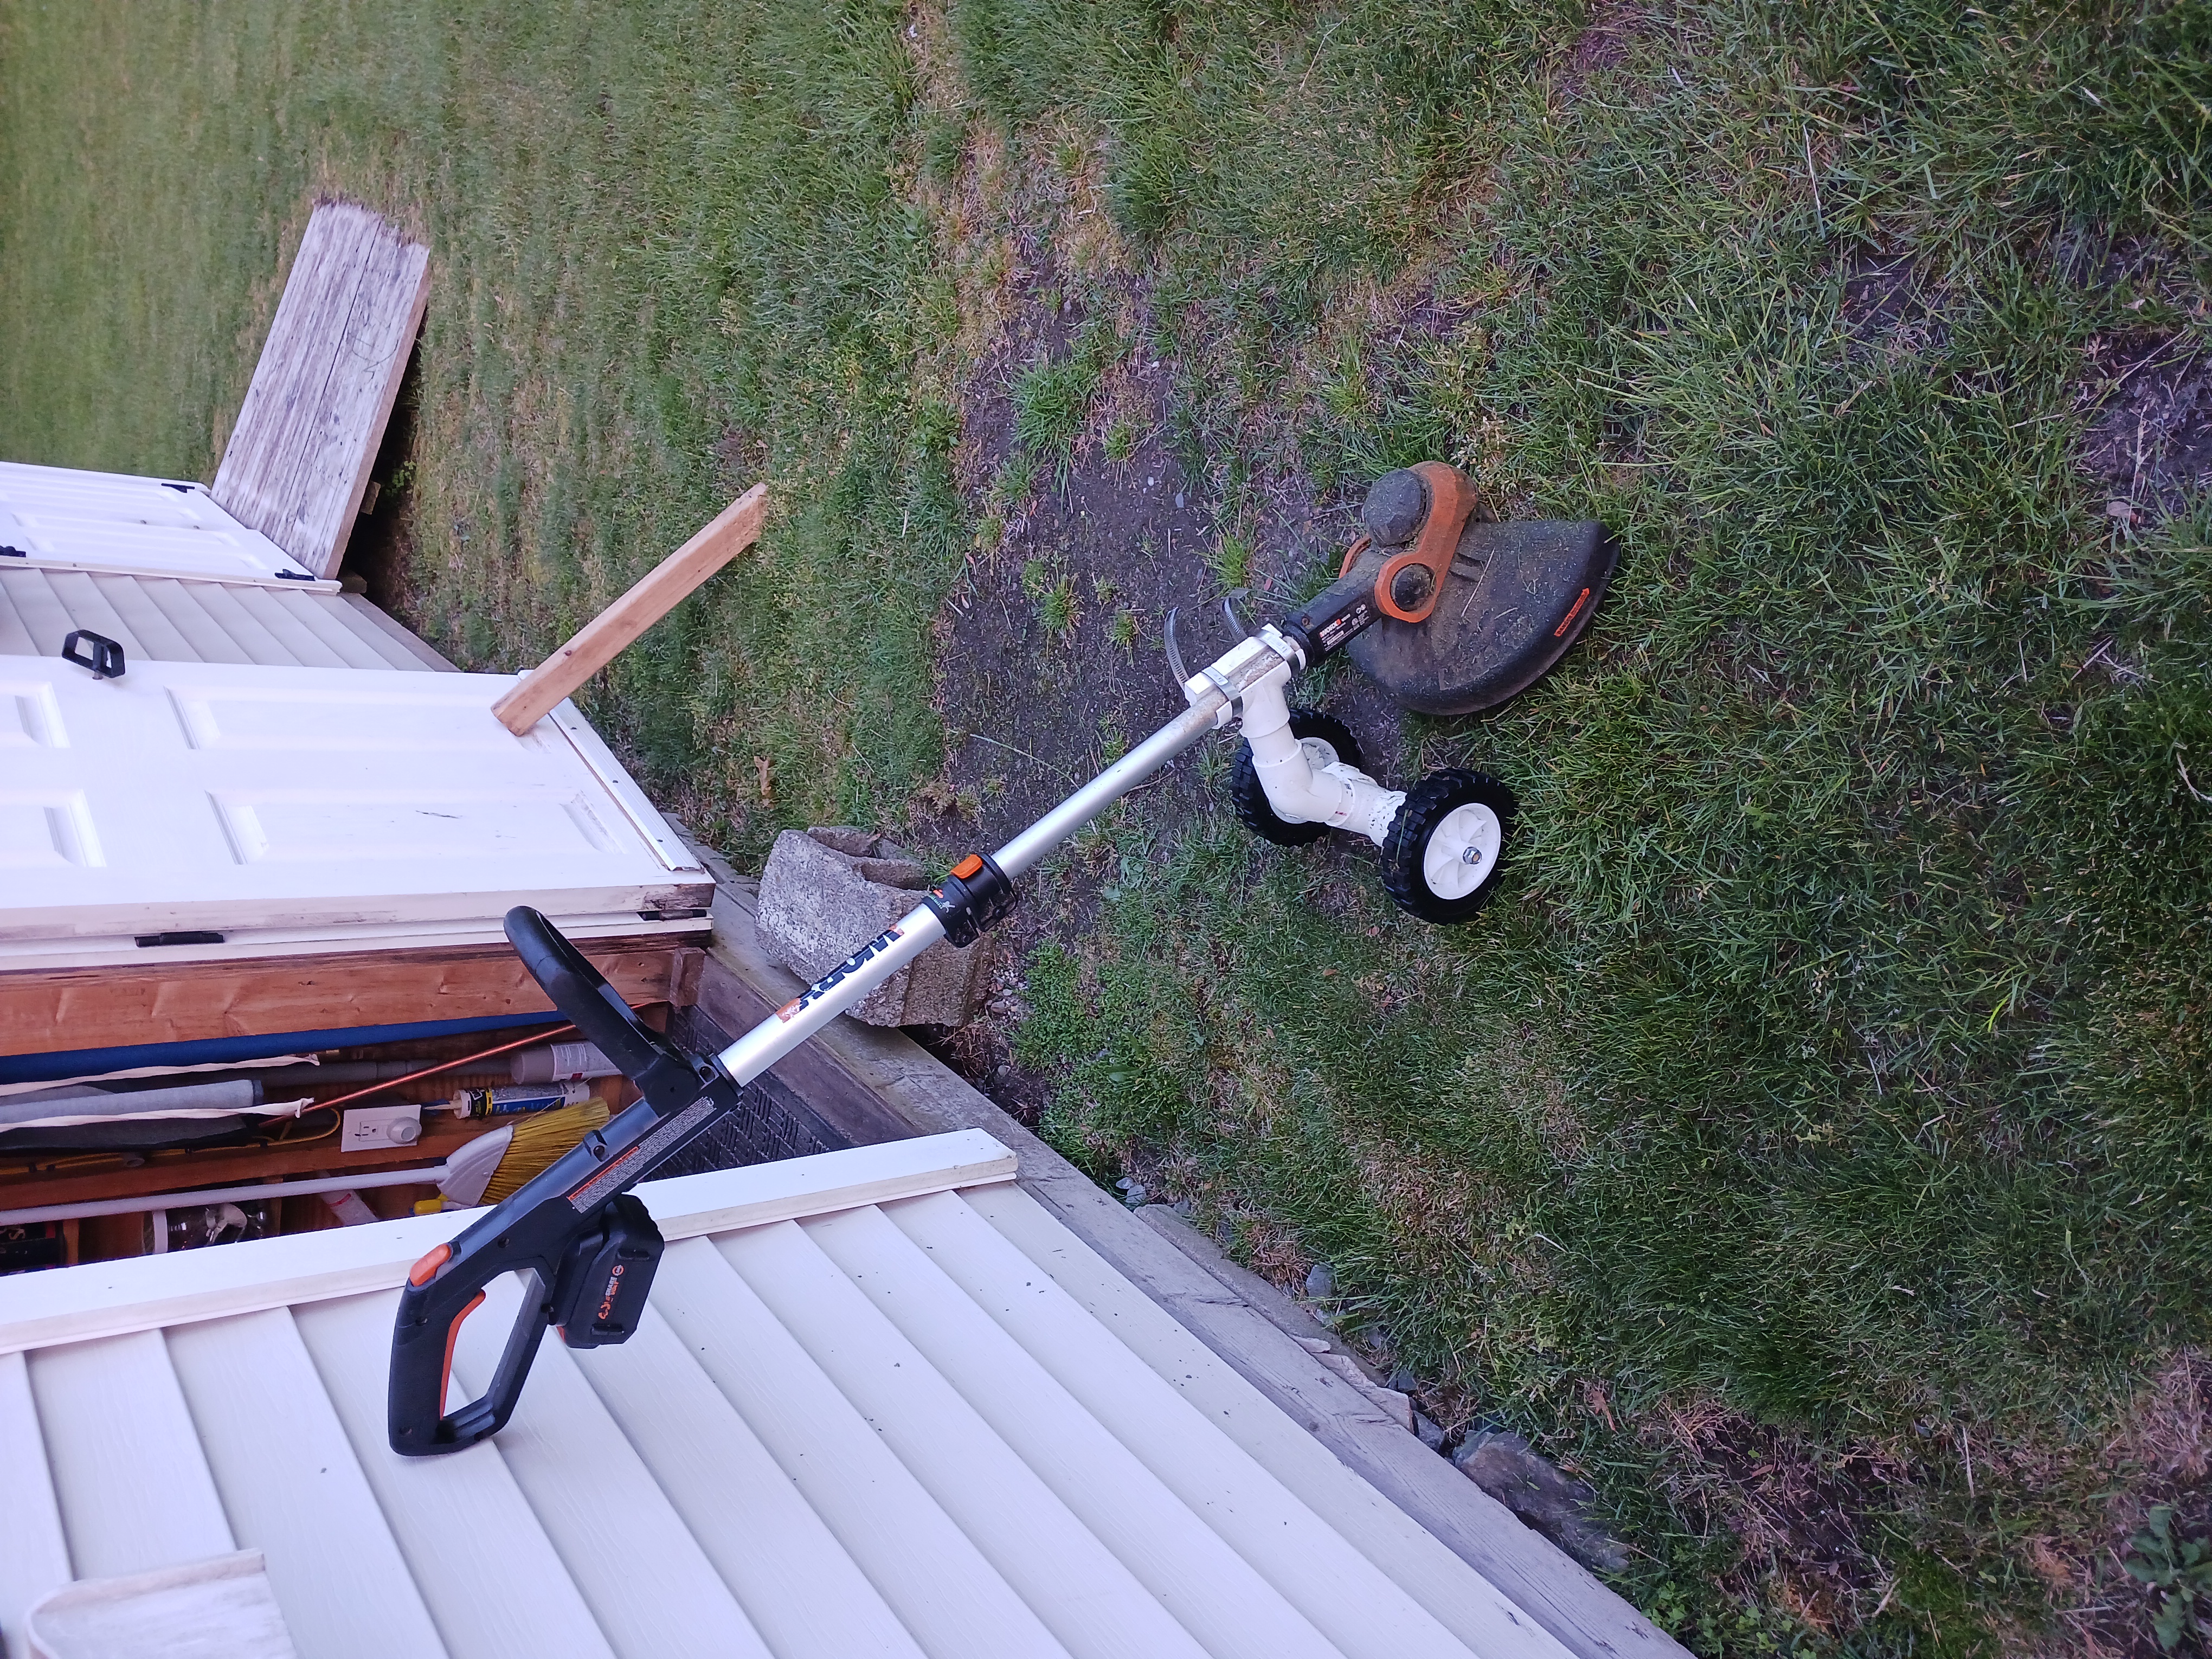
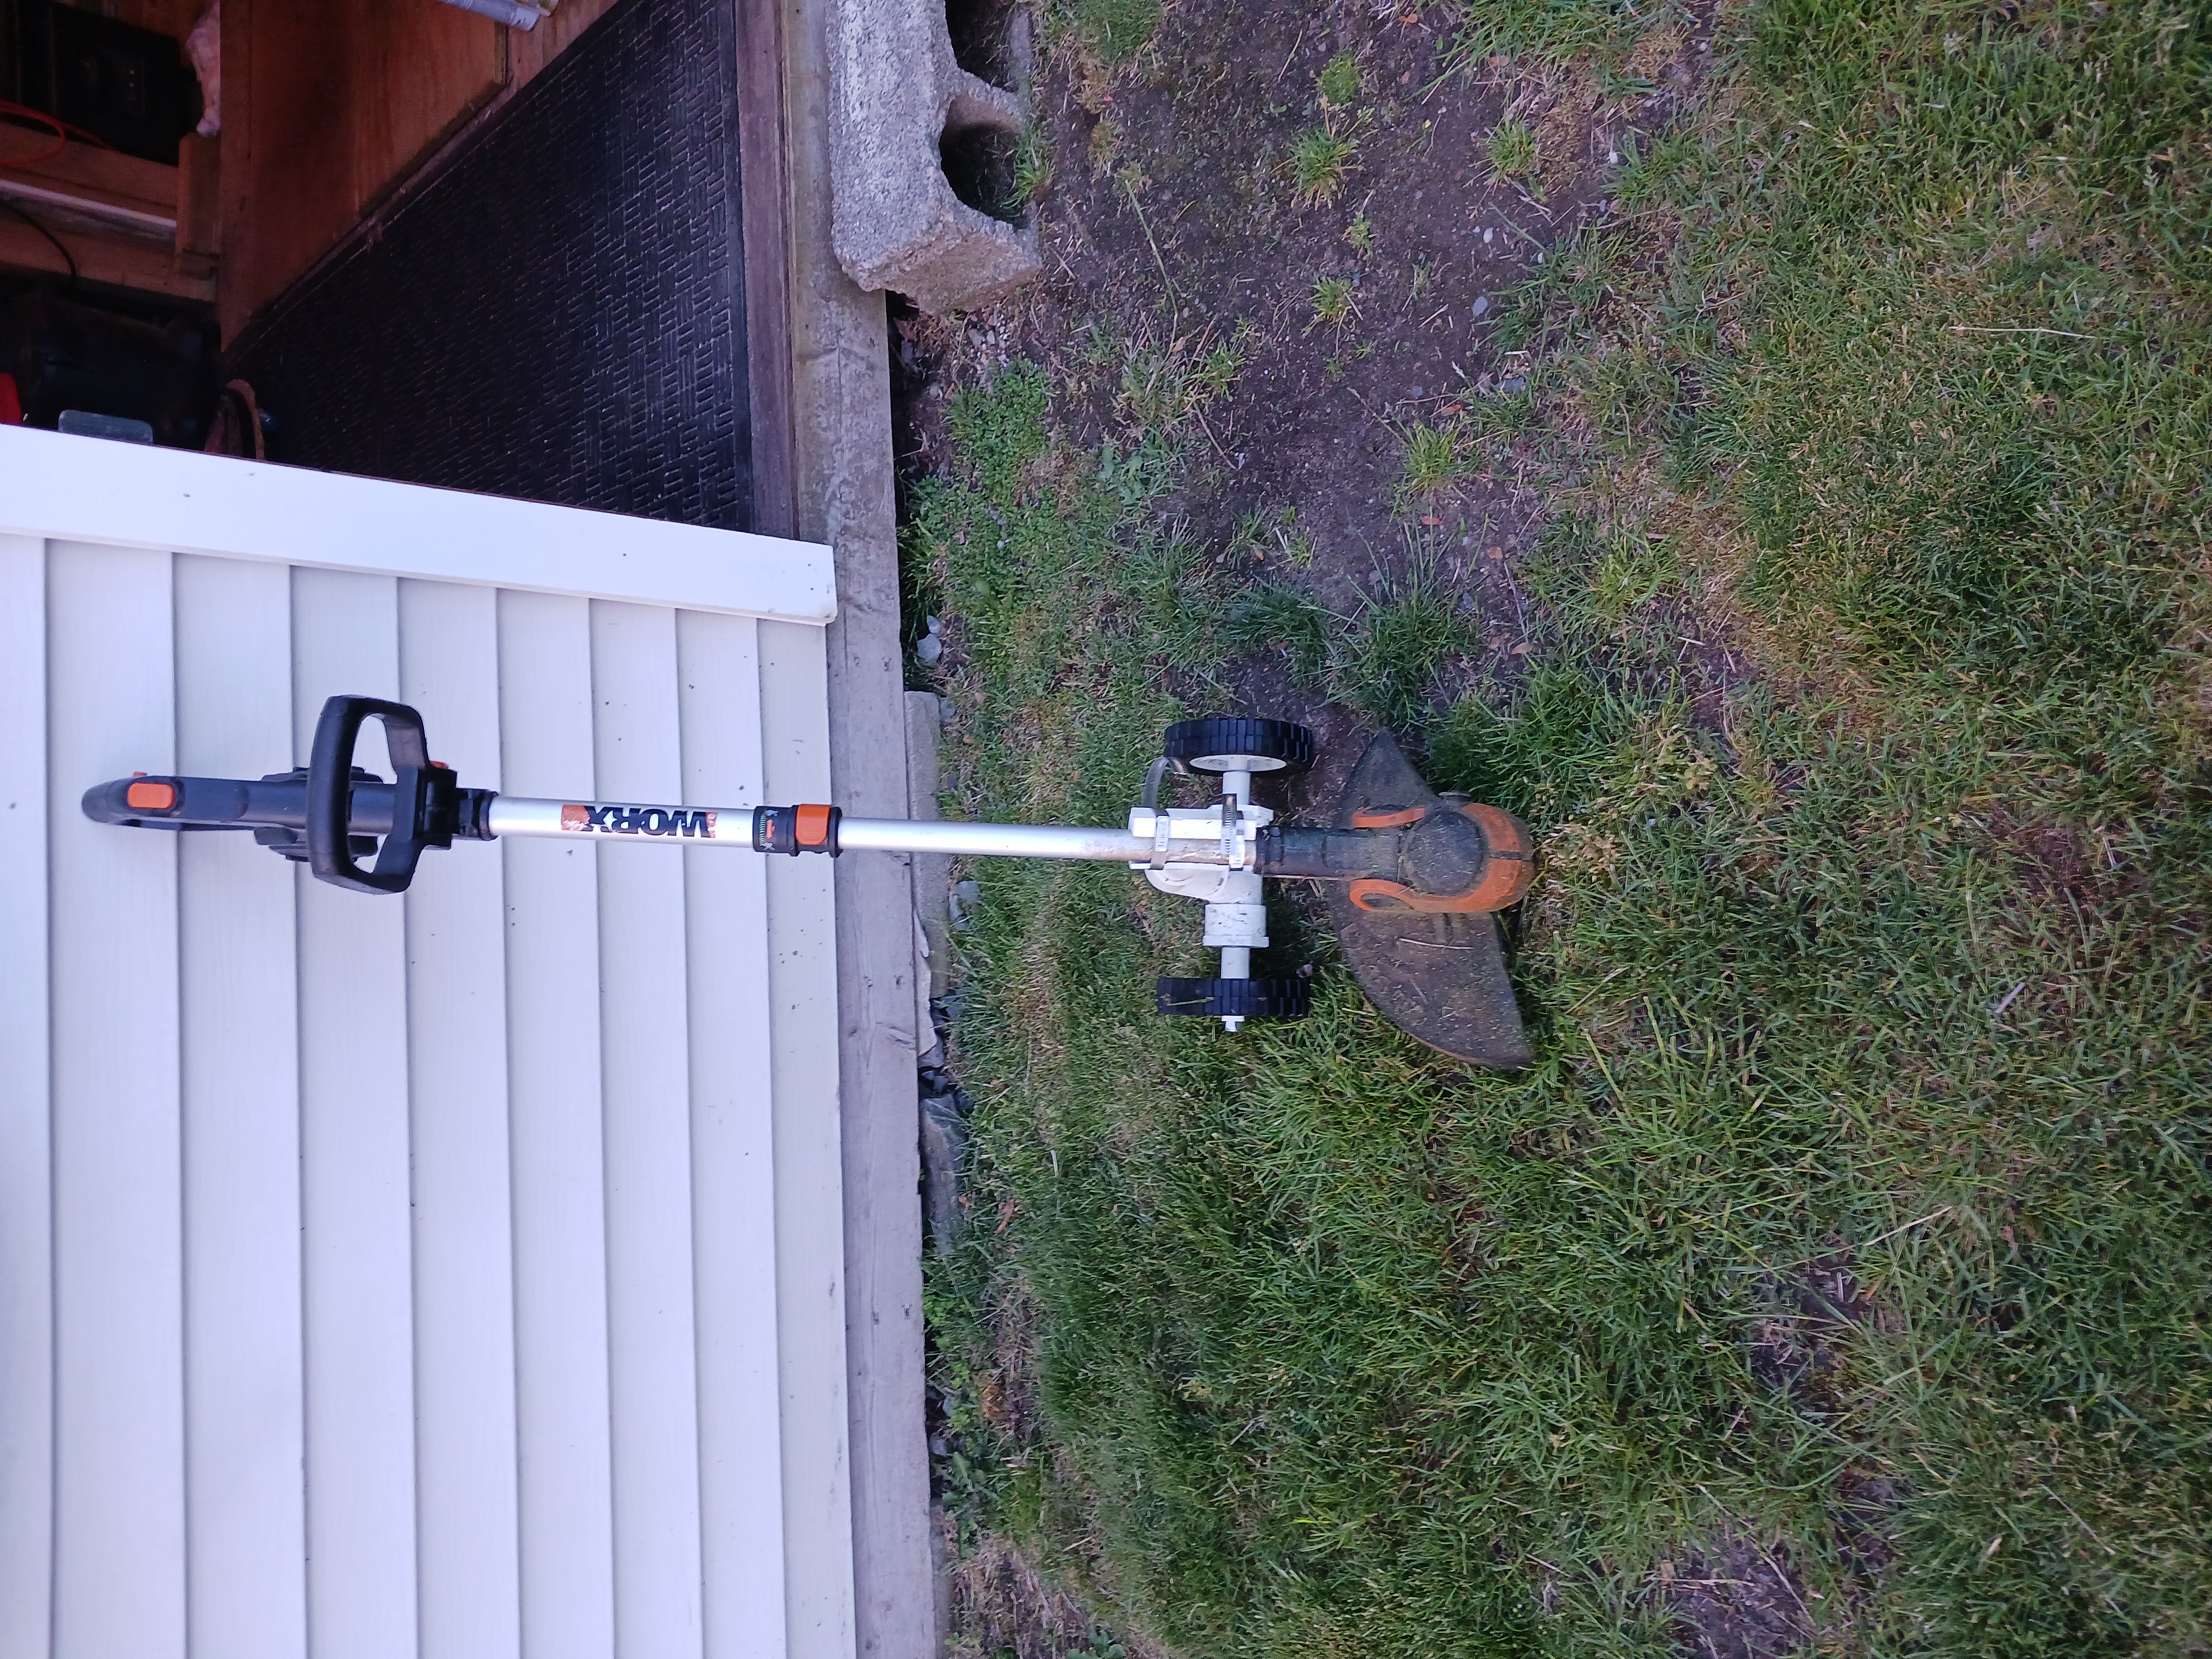
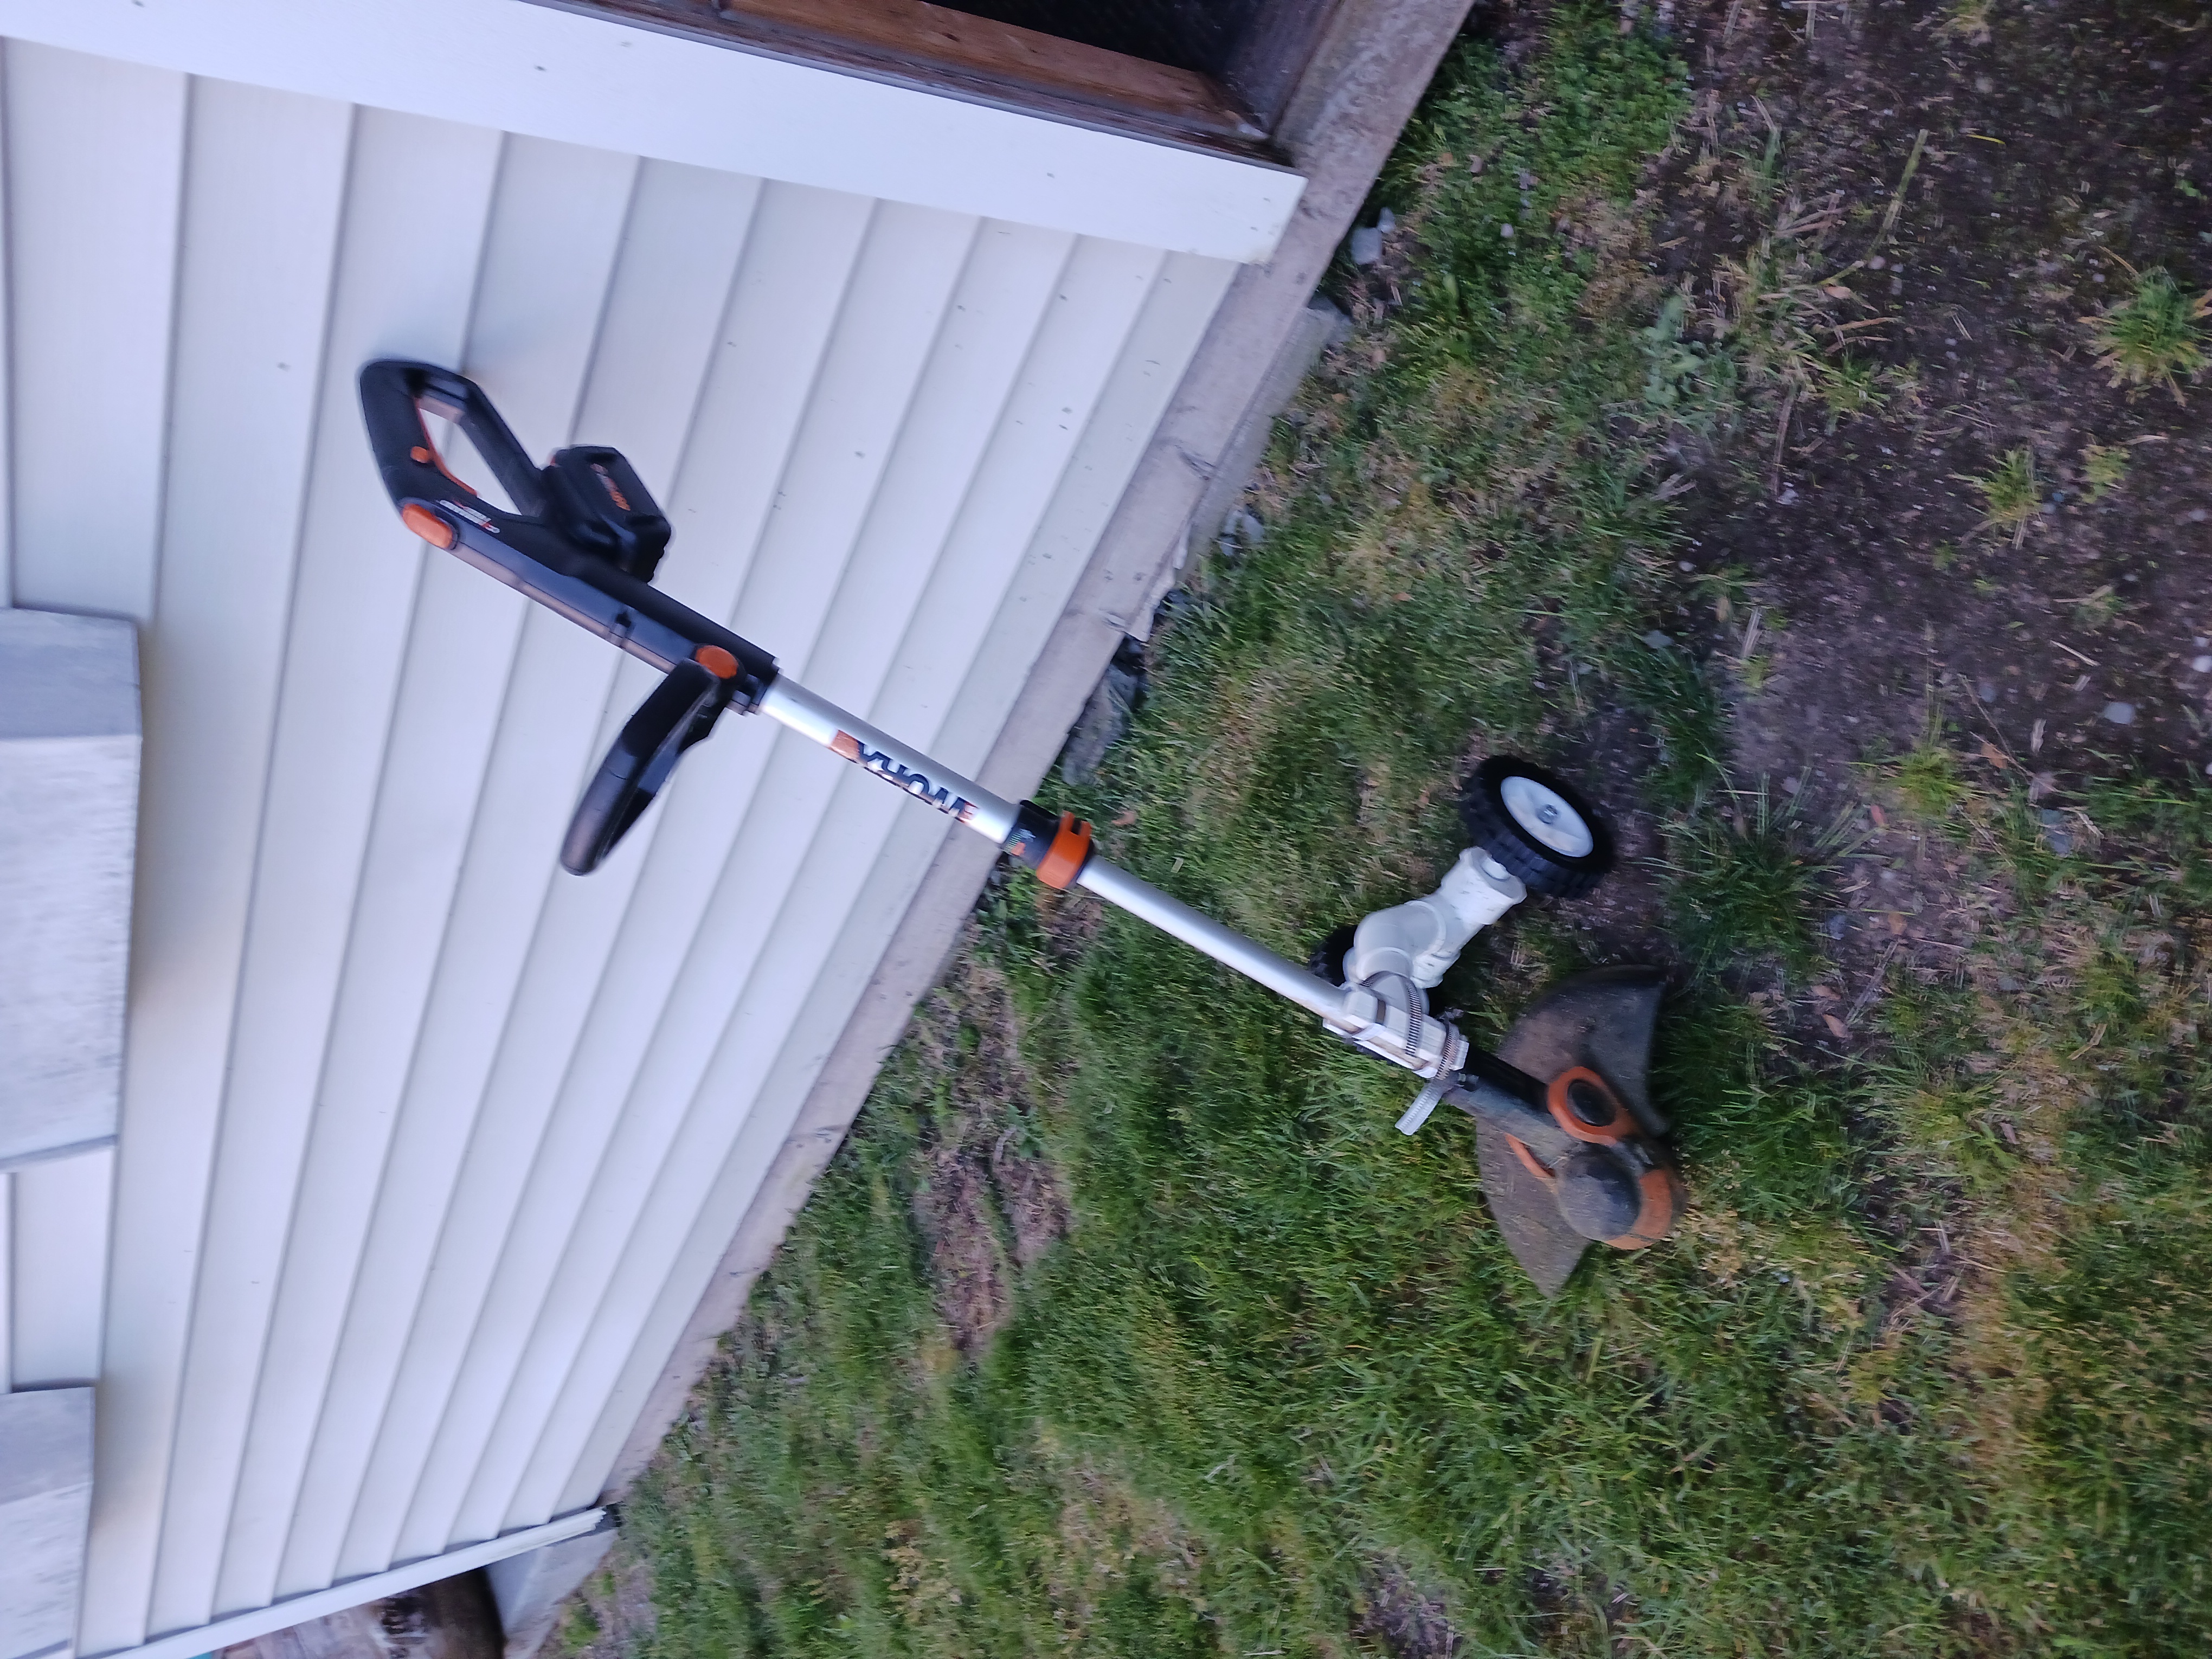
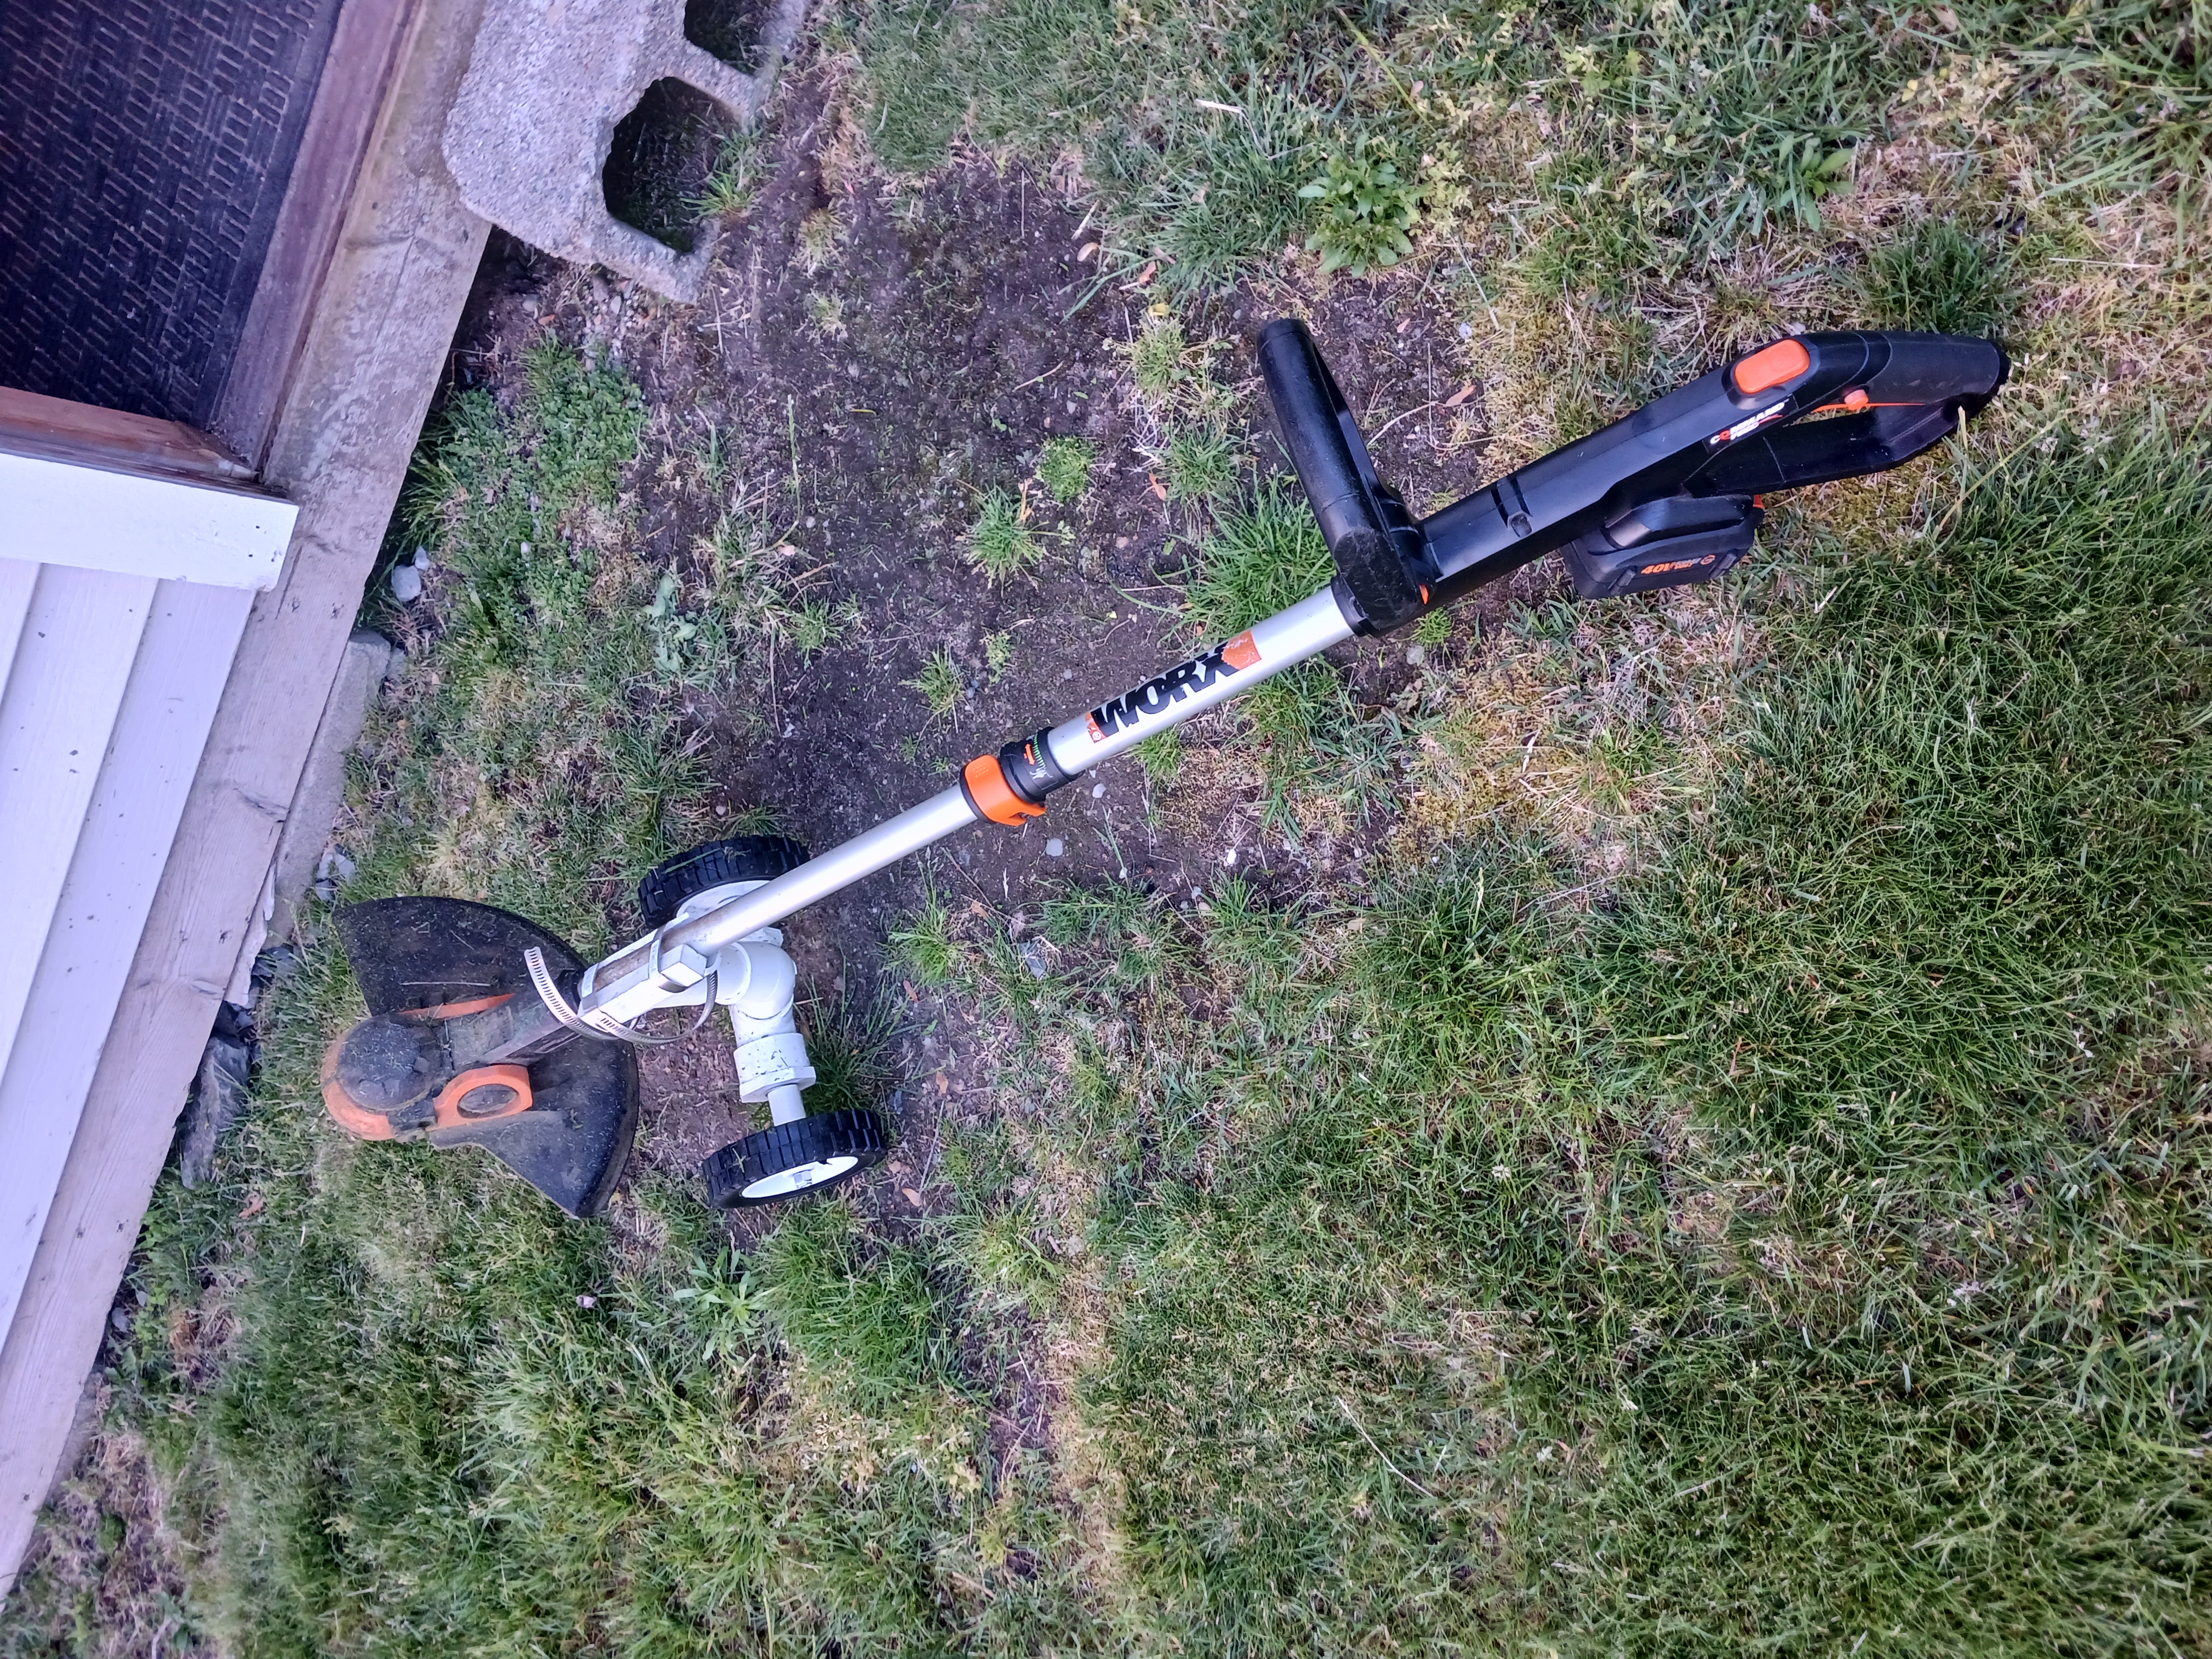
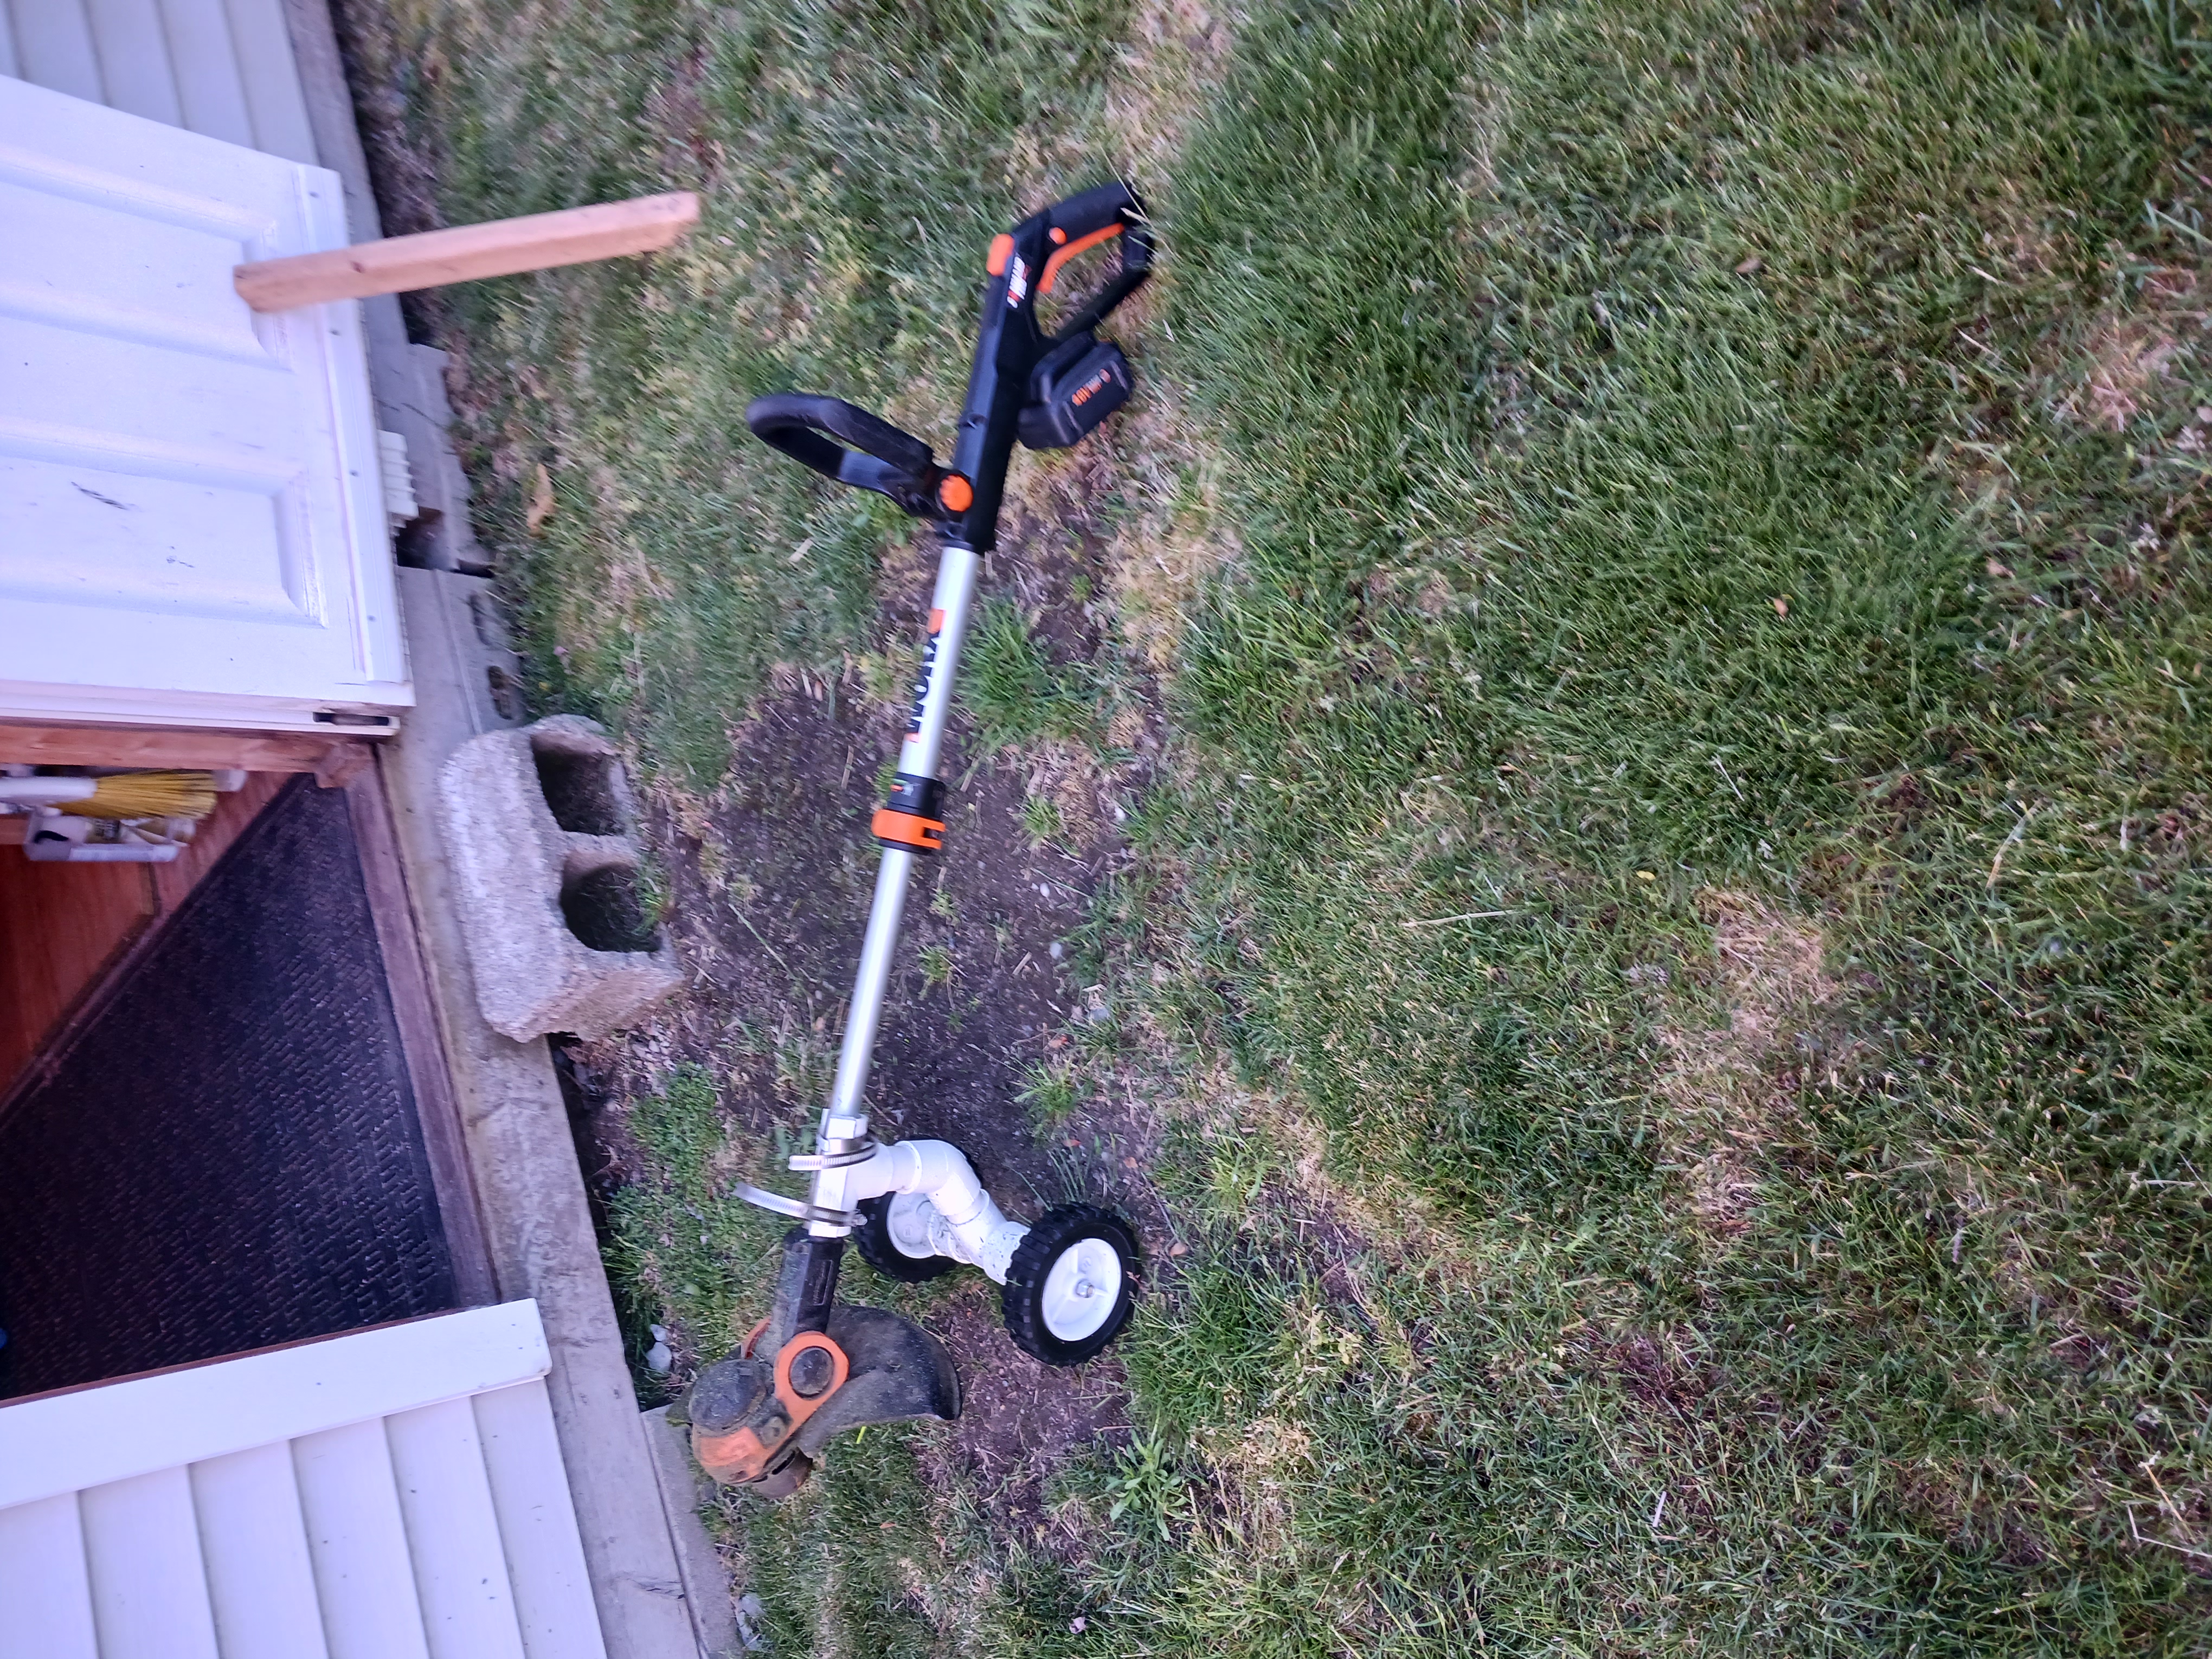
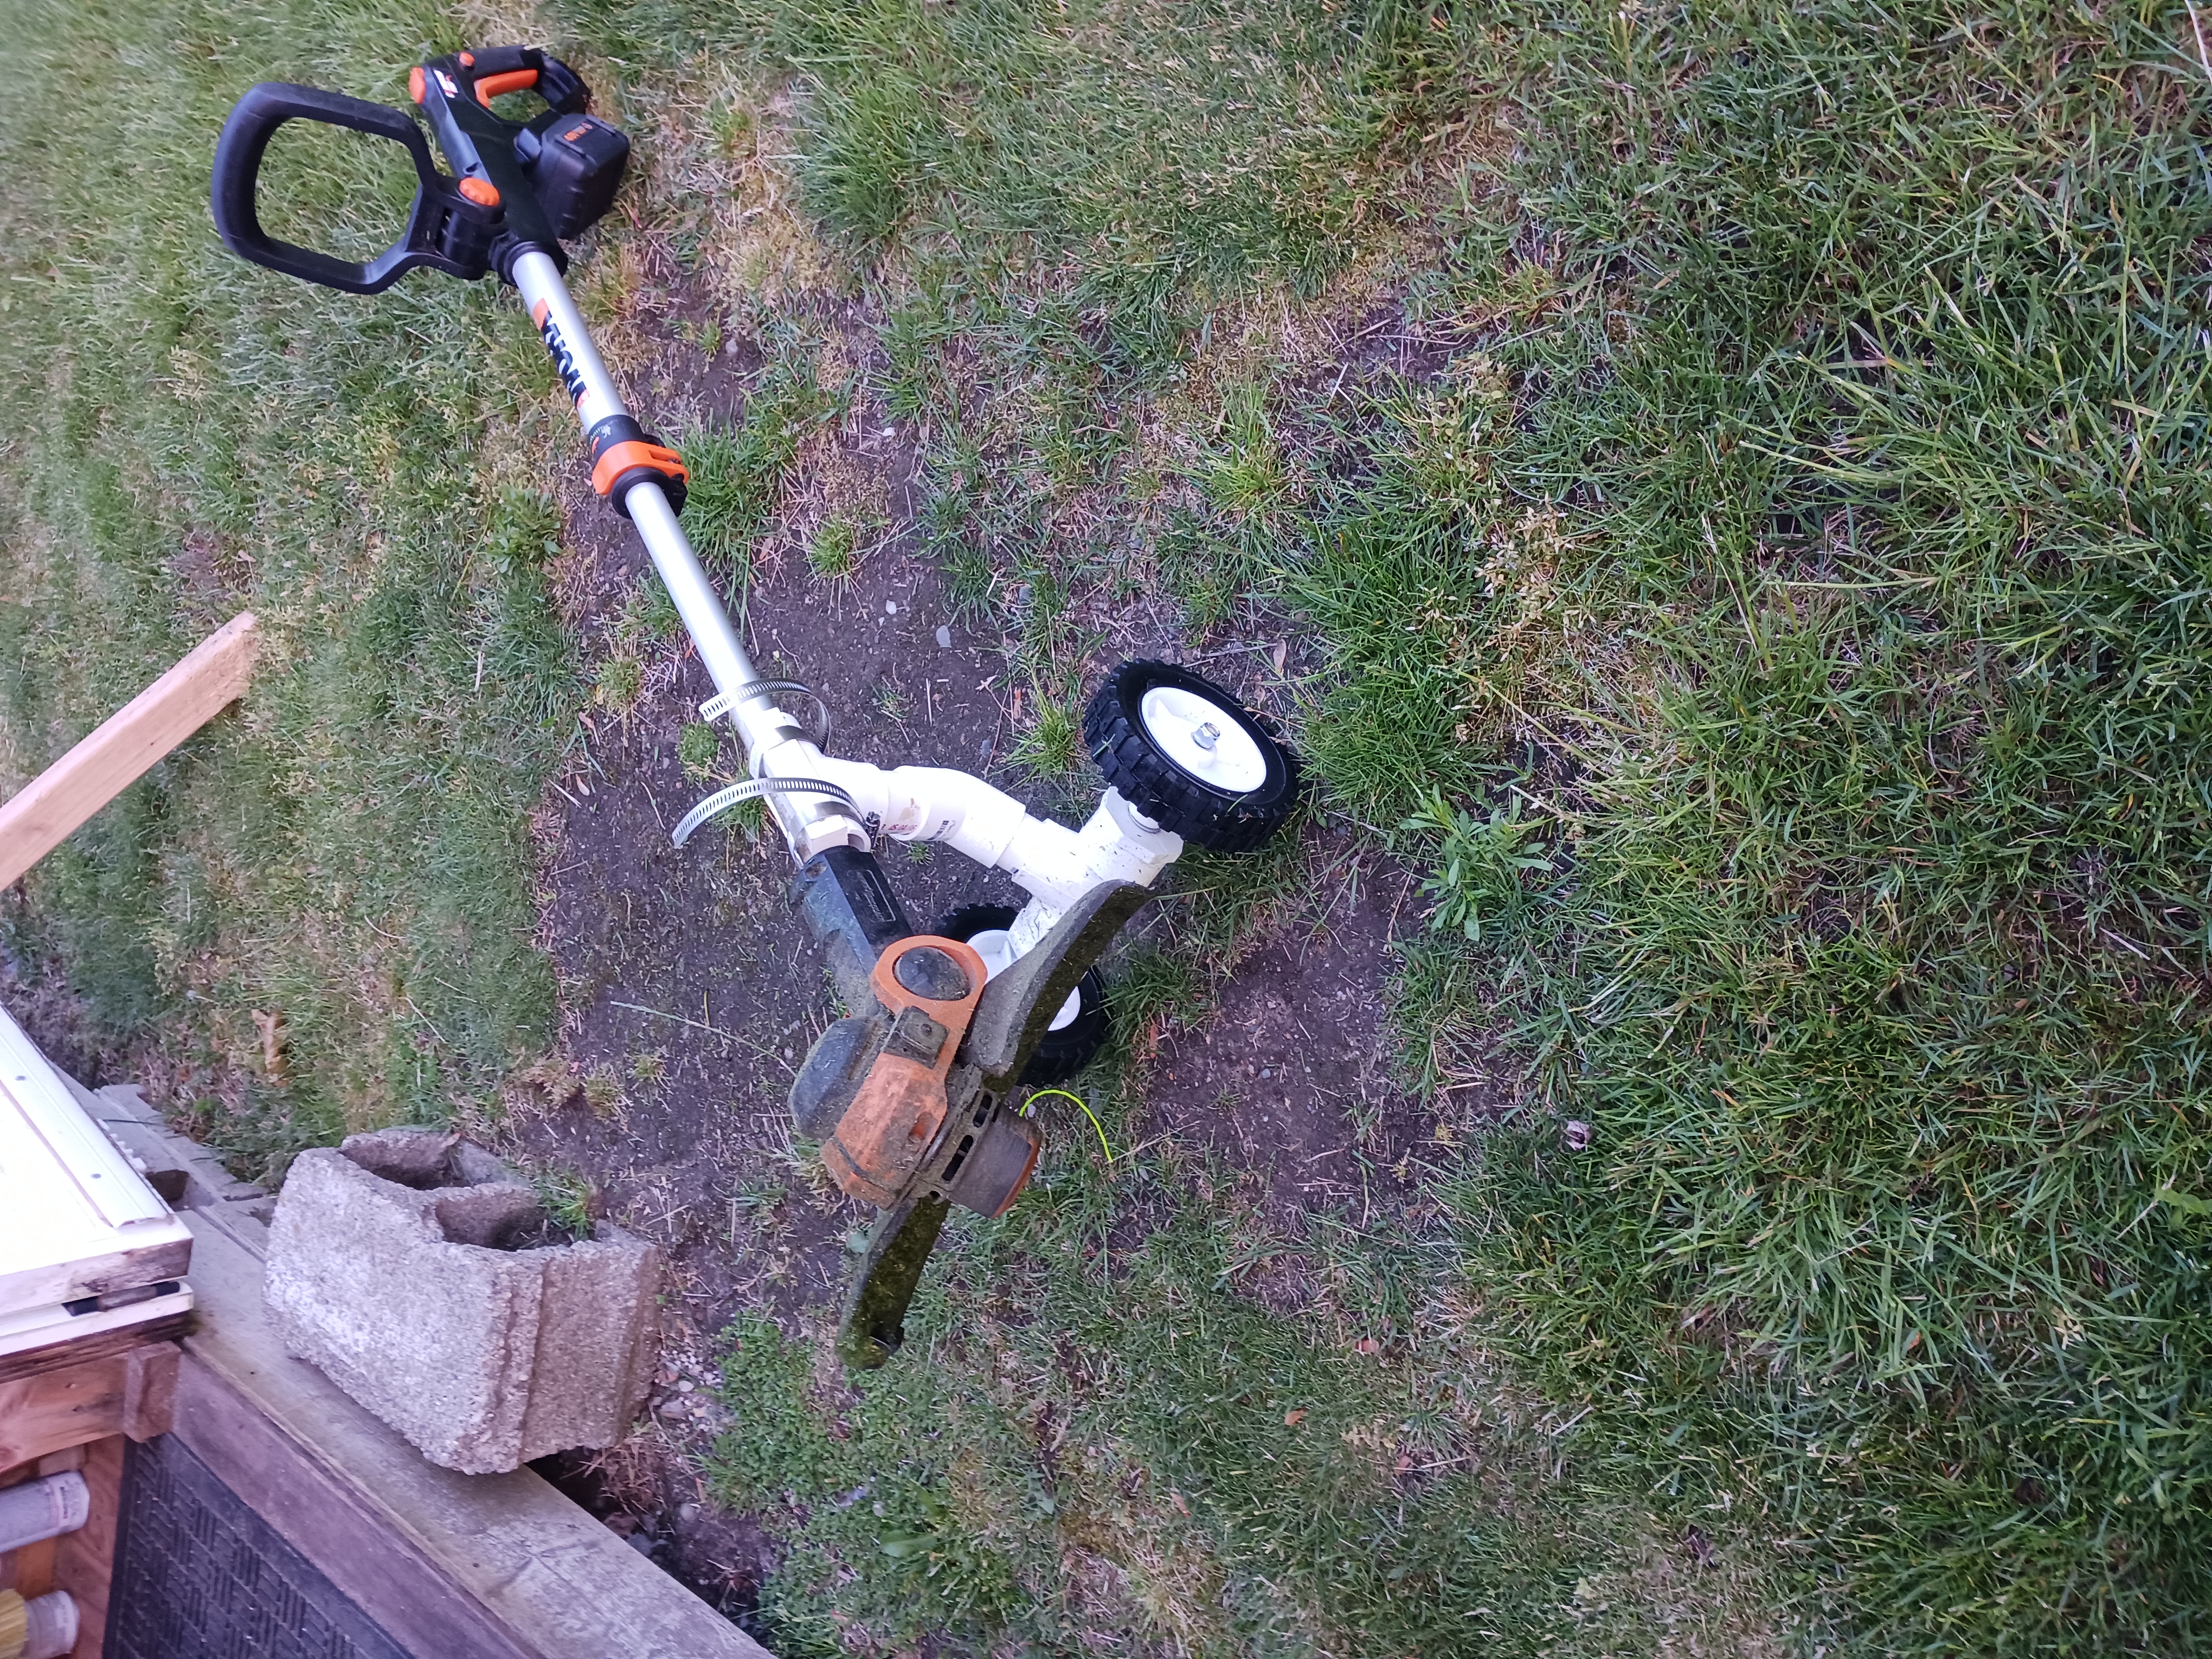
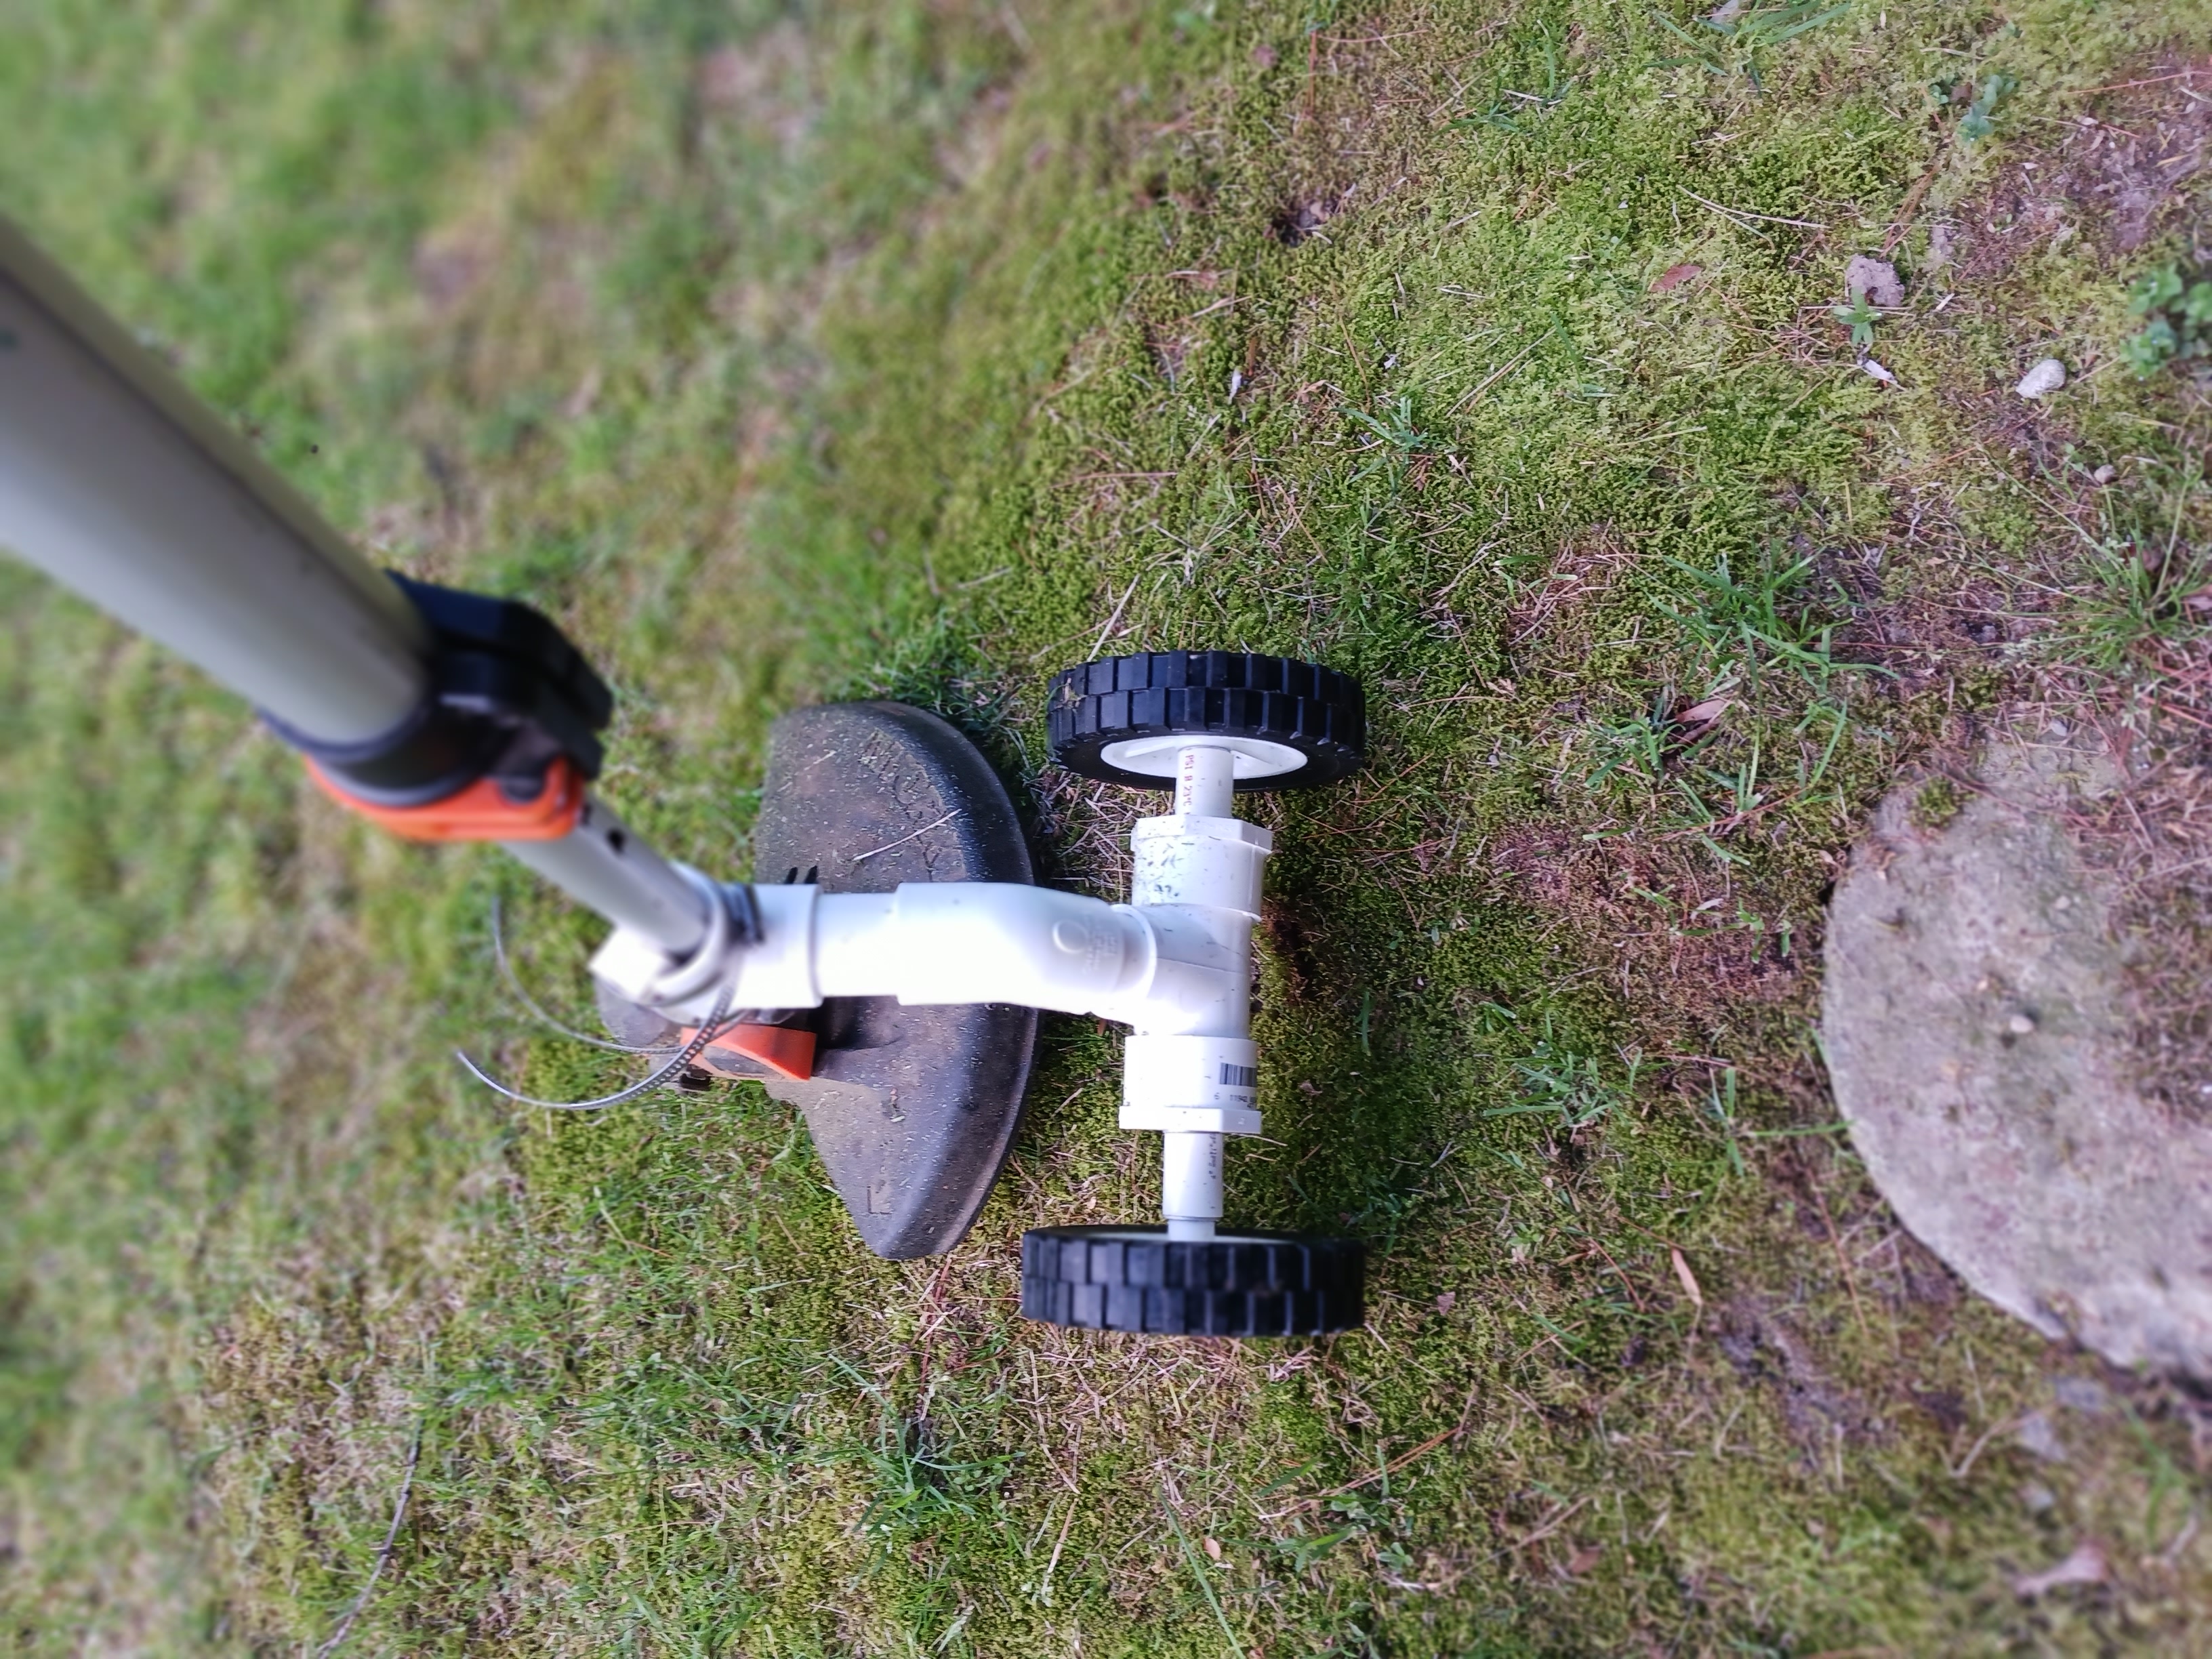
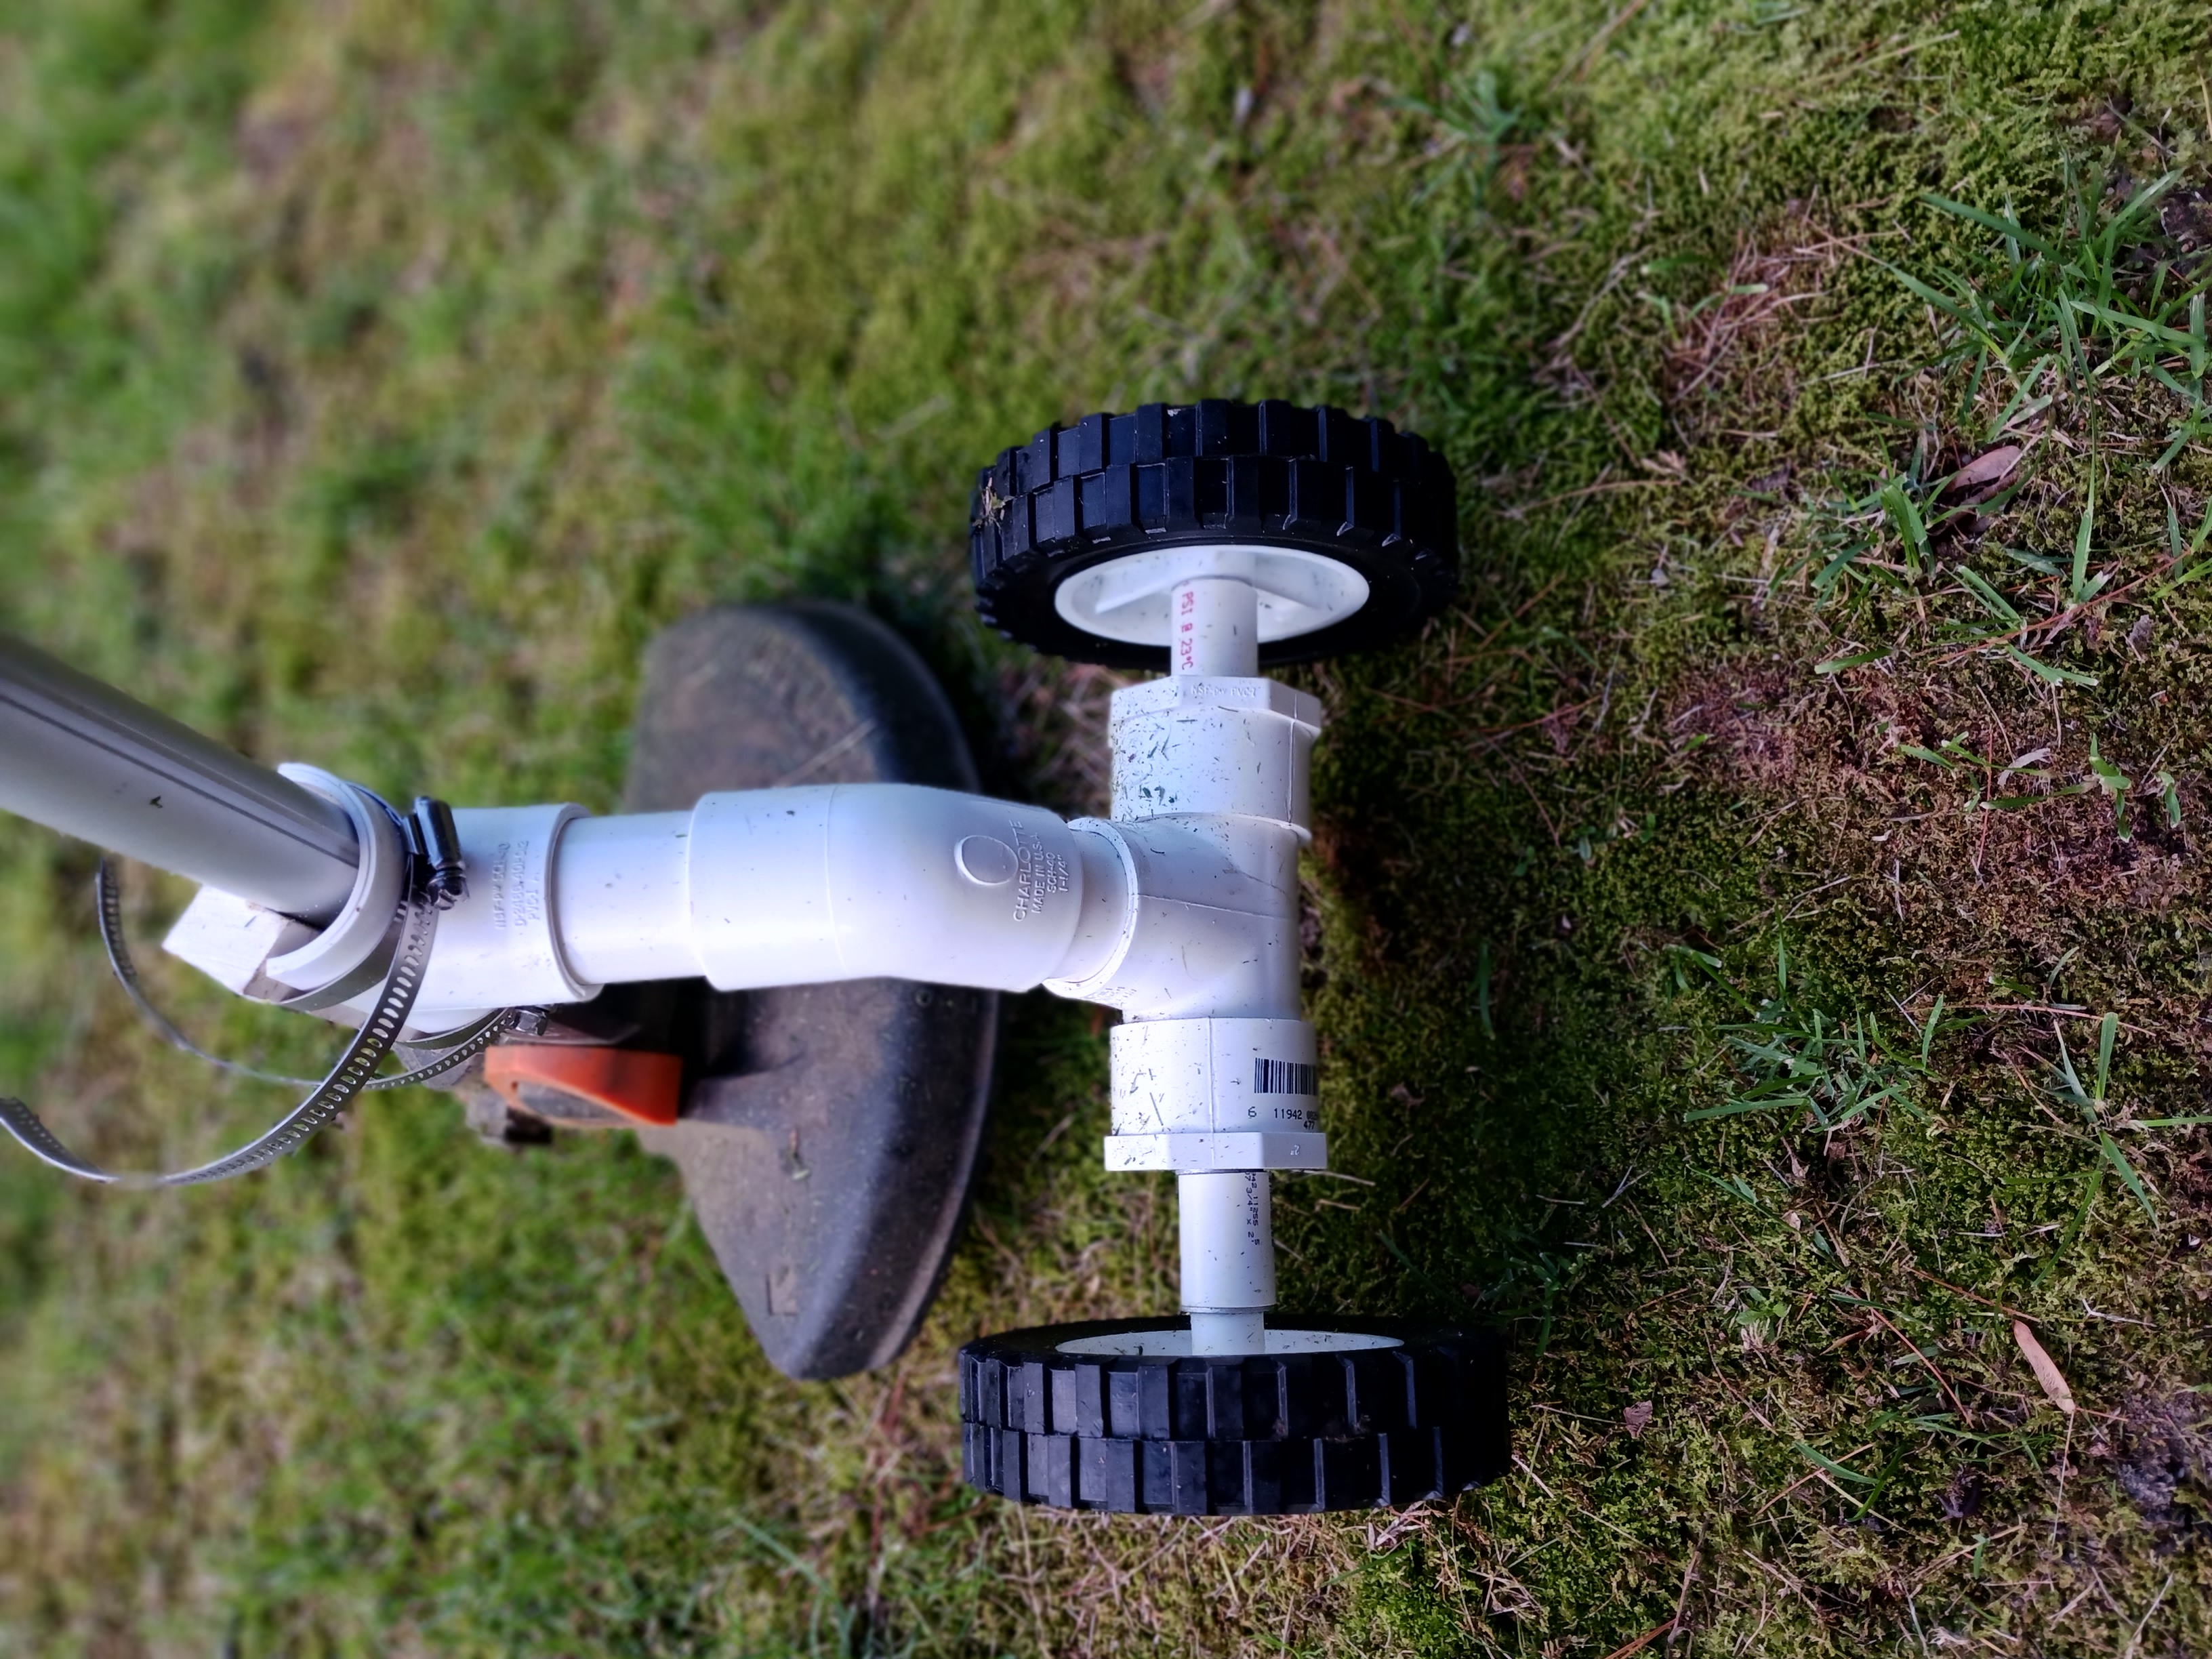
The "tee" that's strapped to the trimmer shaft has been cut to only a half-round, and the elbow fitting below it is angled at 45 degrees, not 90. I'm still refining it, but the general concept works well. I didn't even glue the PVC connections together, and they're still sturdy enough with just a friction fit.
There's a 3/8" threaded rod through the bottom tee and its flat-top end caps. The end caps are drilled with a 3/8" hole in their centers. The 3/8" rod has a washer and nut at each end, which keeps the end caps tight against the tee. PVC spacers, which fit over the end-cap nuts, are next, followed by a washer and then the wheels. And finally, a pair of nylon-insert lock nuts over washers keep the wheels on the rod, Those outermost nyloc nuts aren't tightened too much, so as to let the wheels spin freely.
posted at: 6:37am on 20-Jun-2022
path: /Home_and_Garden | permalink | edit (requires password)
| January 2026 |
|---|
| Sun |
Mon |
Tue |
Wed |
Thu |
Fri |
Sat |
| |
|
|
|
1 |
2 |
3 |
| 4 |
5 |
6 |
7 |
8 |
9 |
10 |
| 11 |
12 |
13 |
14 |
15 |
16 |
17 |
| 18 |
19 |
20 |
21 |
22 |
23 |
24 |
| 25 |
26 |
27 |
28 |
29 |
30 |
31 |
|
|